Table of Contents
Recording your PowerPoint presentation as a video can make a difference when pitching a client, internally, or transforming your slides into an online course.
Now that Microsoft added a recording function directly into PowerPoint, it has become easier to create a video out of any presentation.
All you need is to start recording yourself narrating.
In this tutorial, we will be taking you through the step-by-step process of recording audio on PowerPoint for both Windows & Mac.
Why Record PowerPoint Presentations?
PowerPoint is a great tool to give live presentations, but there are cases where you won’t be able to present live.
While you could send a PPT file or PDF export, a presentation recording allows you to capture the sentiment of the topic, and helps connect with your audience.
Videos are more engaging than presentations, and especially when giving a lecture or training online, video is a better solution.
Let’s hit that record button and go directly to the instructions:
Recording a PowerPoint Presentation on Windows
Windows is the default option for PowerPoint, follow the instructions below to turn your slides into video. All you need to do is find the Record tab and follow the step-by-step instructions to create a video presentation in no time.
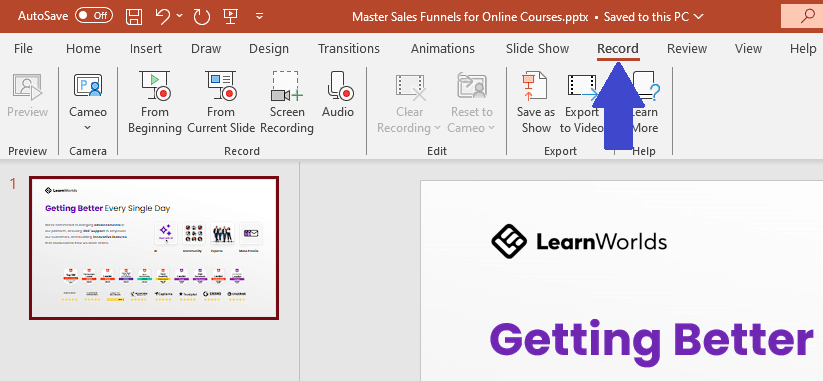
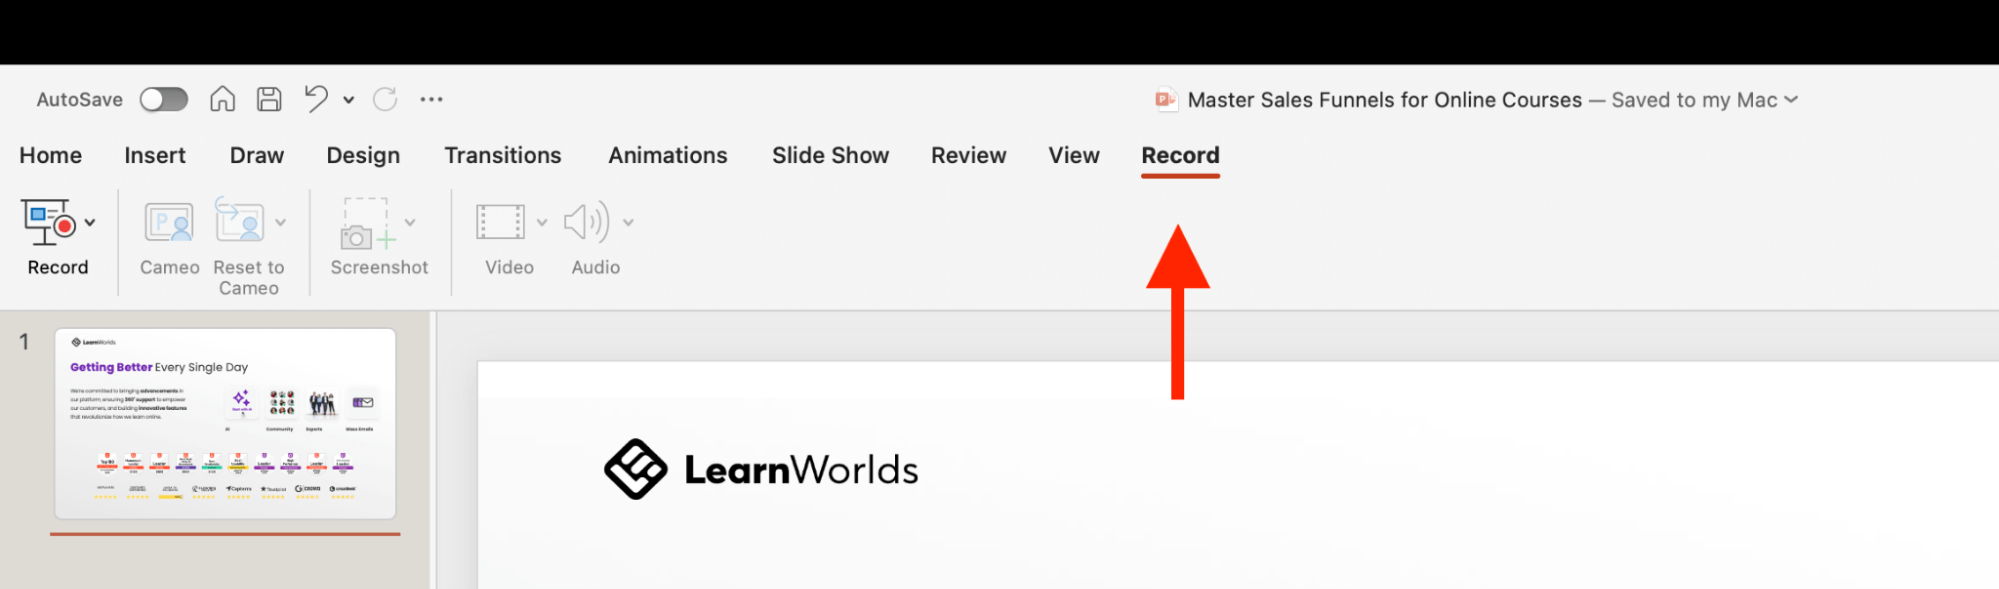
Go to the Record Tab
Located in your toolbar, the record tab includes all the options for recording a video inside the software. Click on it to bring up all the options for recording a video.
Record slide show
Now, you need to start the audio recording and follow the steps to record your PowerPoint slides to turn them into video.
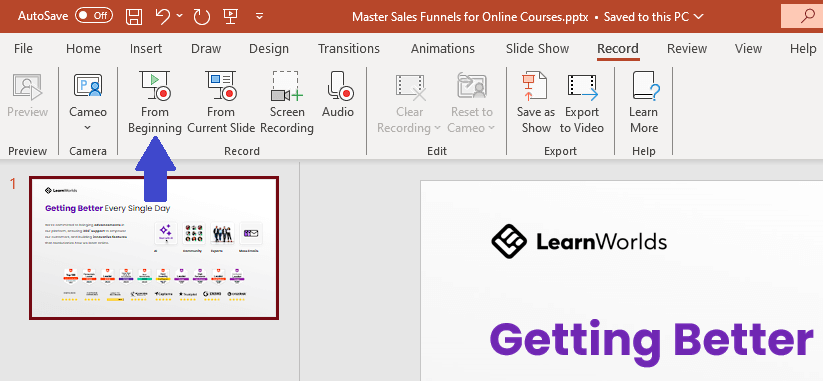
Start the Recording
Choose whether to start the recording from the beginning or a specific slide. This will bring you to the full-screen recording mode.
Settings
Be sure to check all the recording options including the camera, microphone, narration, and letter size of the transcription before you start recording.
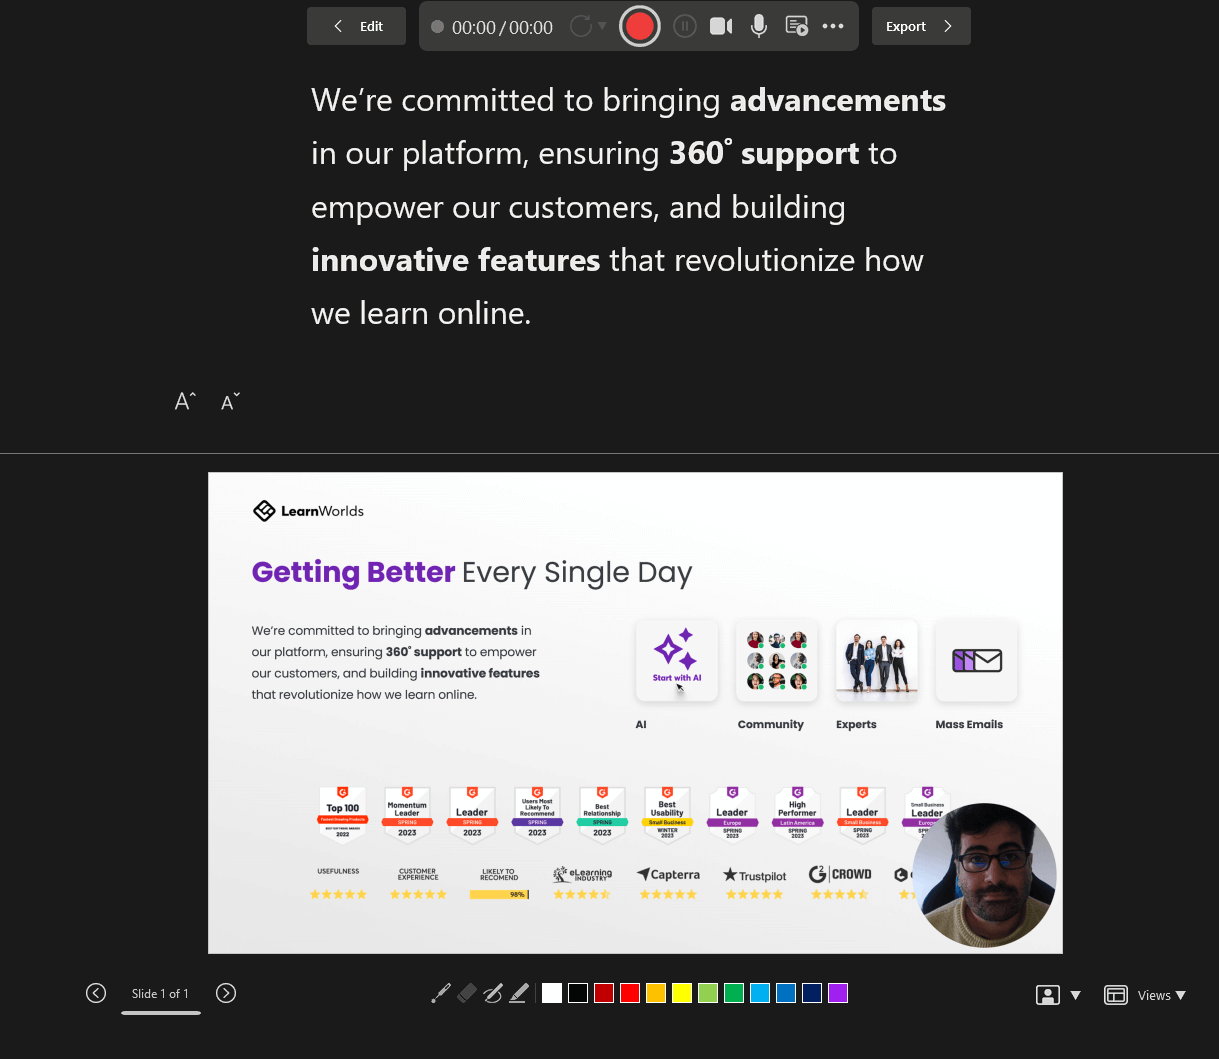
Start recording
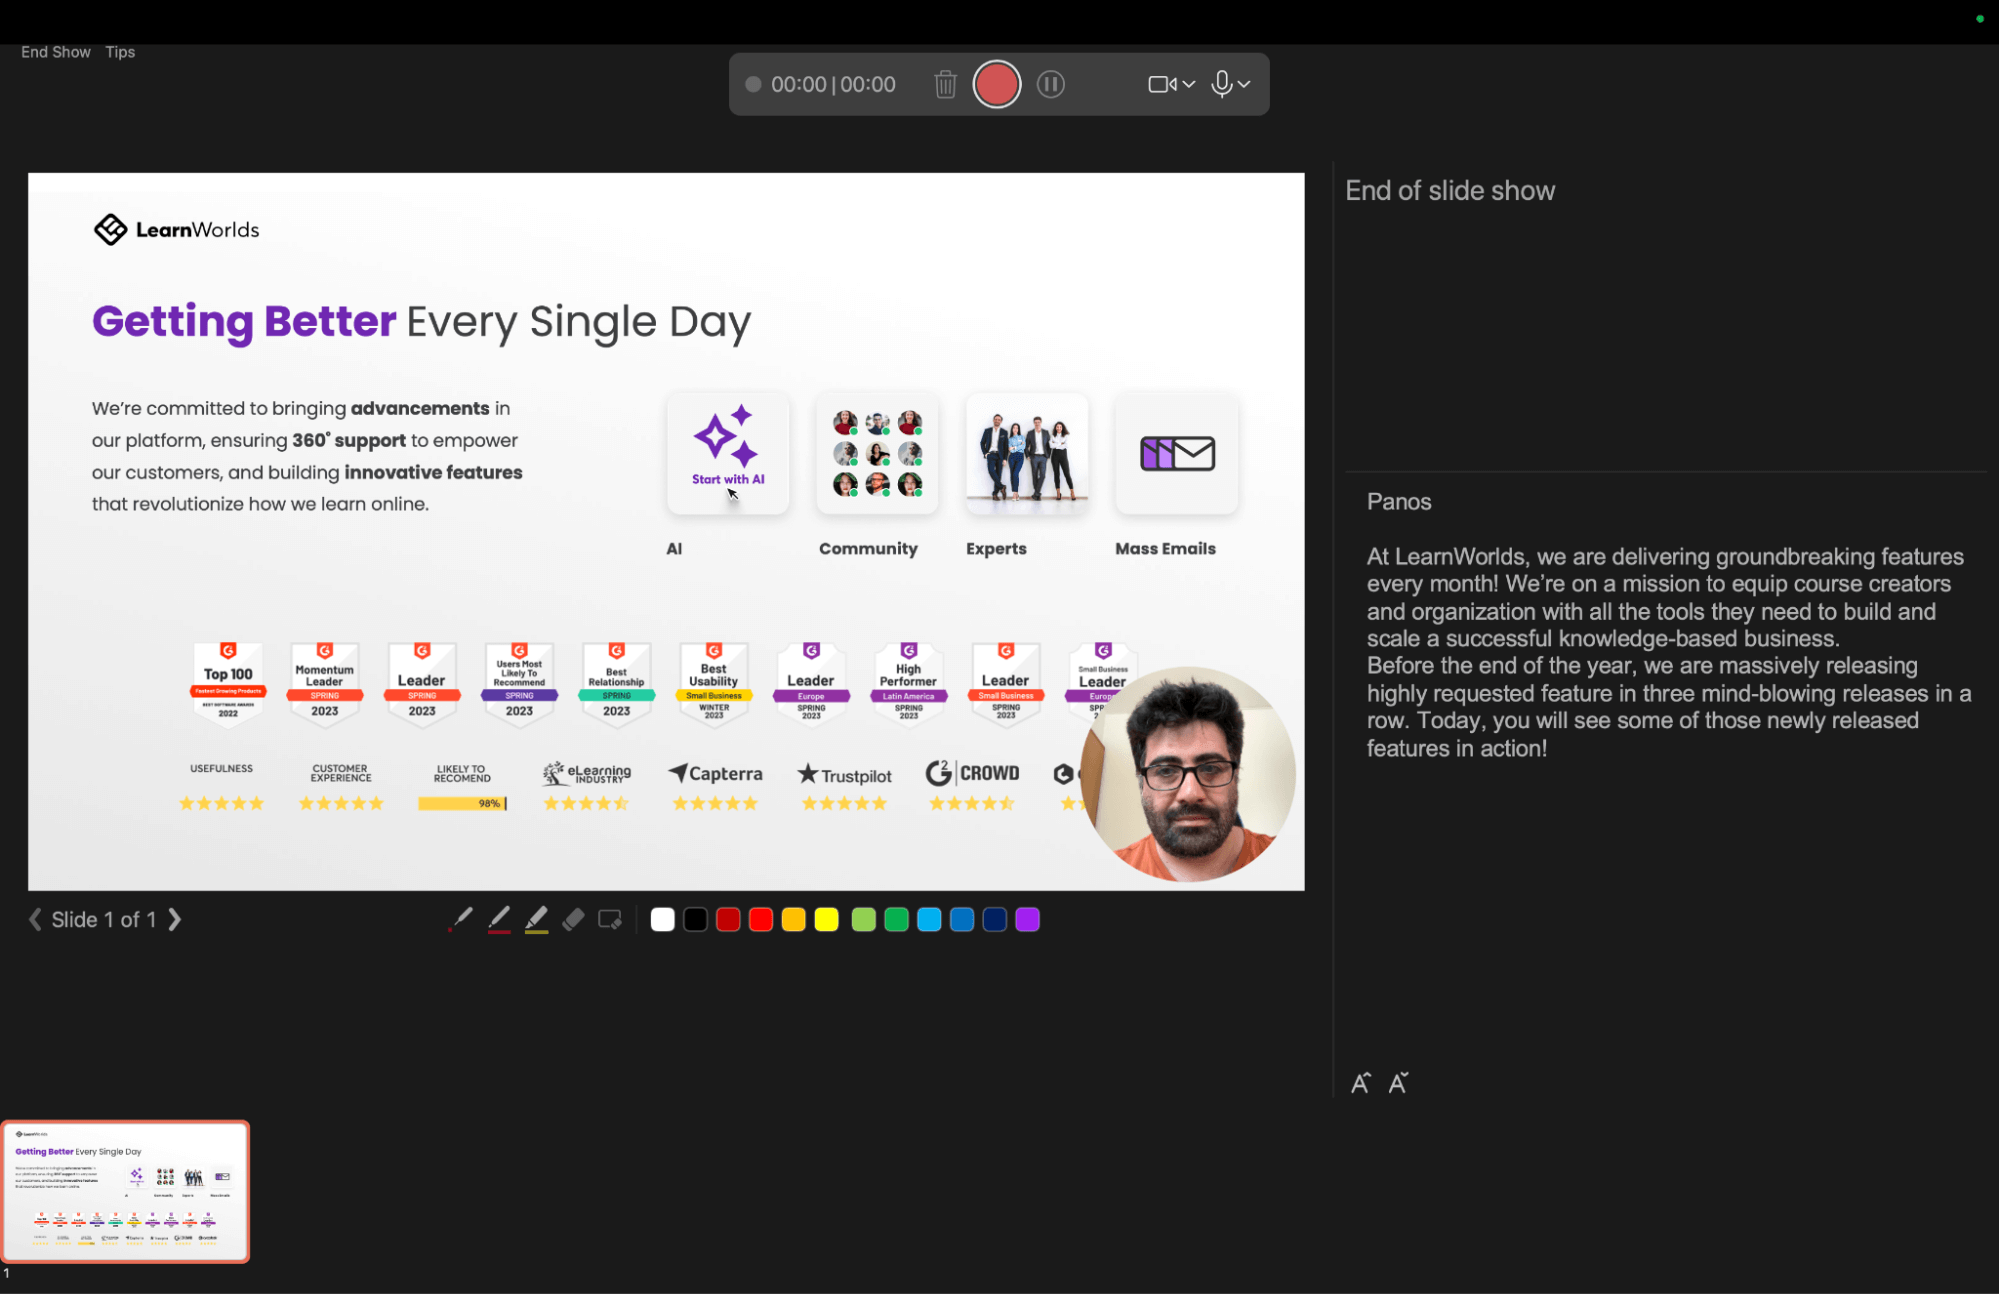
Click on the red circle to start recording. Wait for the countdown and start presenting (or narrating).
Tip: Replay the video playback and ensure the recording is good enough before saving. You may need to delete and reshoot it.
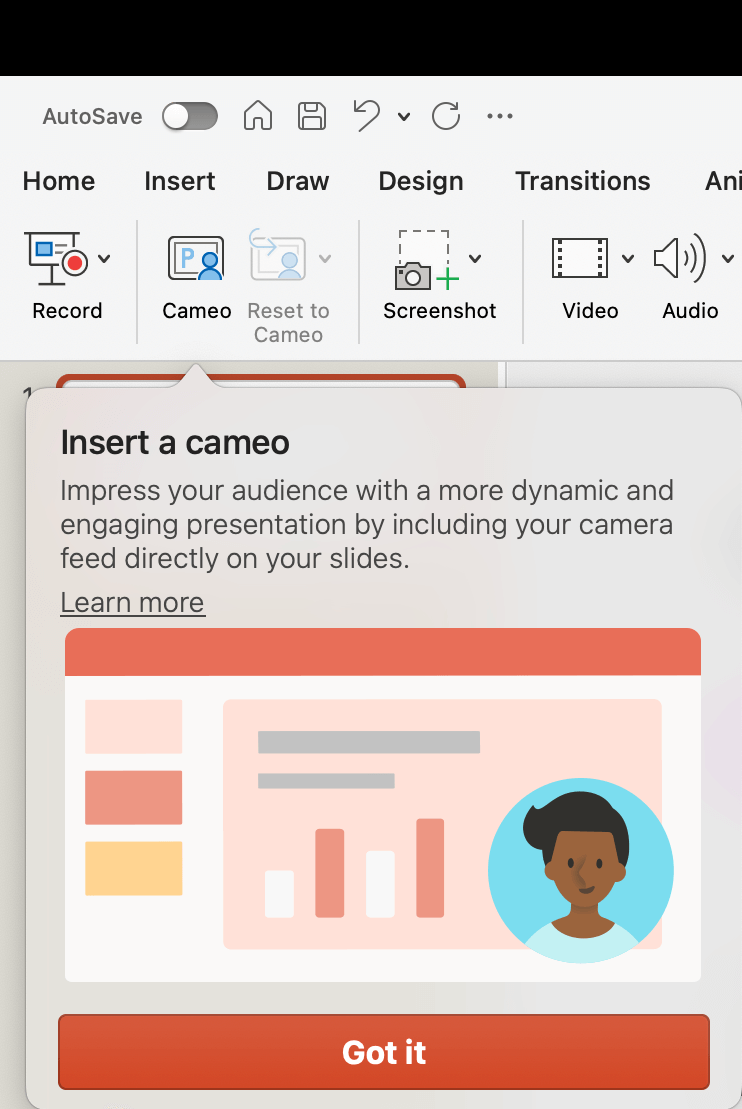
Use the Cameo feature
A recent addition to Microsoft PowerPoint is the Cameo feature where you can also record video from your webcam directly into the presentation. Read more on Microsoft’s website about it.
On the presentation, all you need to do is click on the camera icon 📹 while in presenting mode.
Control the presentation, timing, and transitions
While in presenting mode, you can control the transition between the slides by clicking the next slide button. You will also see the time you are recording to control your timing between slides.
Keep an eye on the timer.
Export the Video
On Windows, there is the Export option in your toolbar to save the recording as a video. Alternatively, you can go through the main menu, but it’s easier after you hit stop to just export directly.

Choose a destination for your video or audio file before hitting the button for “Export Video”.

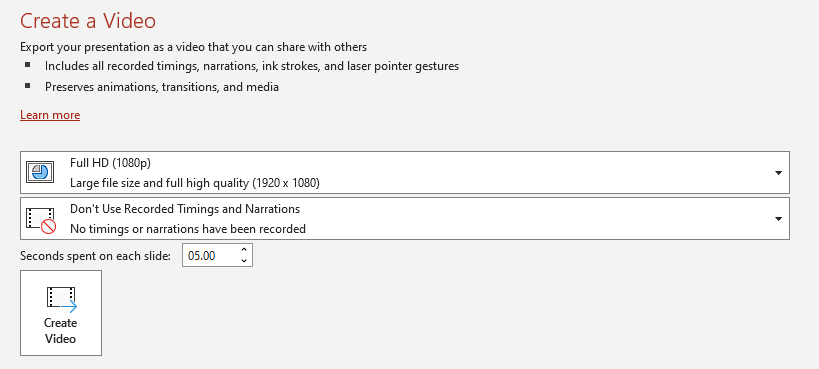
Customize Export
Choose “customize export” and select your preferred setting for the video file. Here is where you can select your preferred quality, dimensions, and more.
Then, click “Create Video” to get your video file.
Edit the Recording
For longer video recordings, it’s a good idea to do some video editing, trim pauses, and make your presentation look more professional. You may want to add transitions or sounds as well.
Especially if you are creating an online course or training, your presentation will look more professional after editing. Consider a professional video editor to help you out.
Check out our choices for video training tools to edit your videos.
Upload to your LMS
For video training or courses, you will need somewhere to host and deliver your videos to your learners.
LearnWorlds is the top online course platform, you can easily upload your video as a video learning unit.
You can try LearnWorlds a 30-day free trial:
Recording a PowerPoint Presentation on Mac
While PowerPoint is a Microsoft software, many Mac users download and use it on their computers as well. With more than 40k reviews on the app store, PowerPoint is a very popular Keynote alternative.
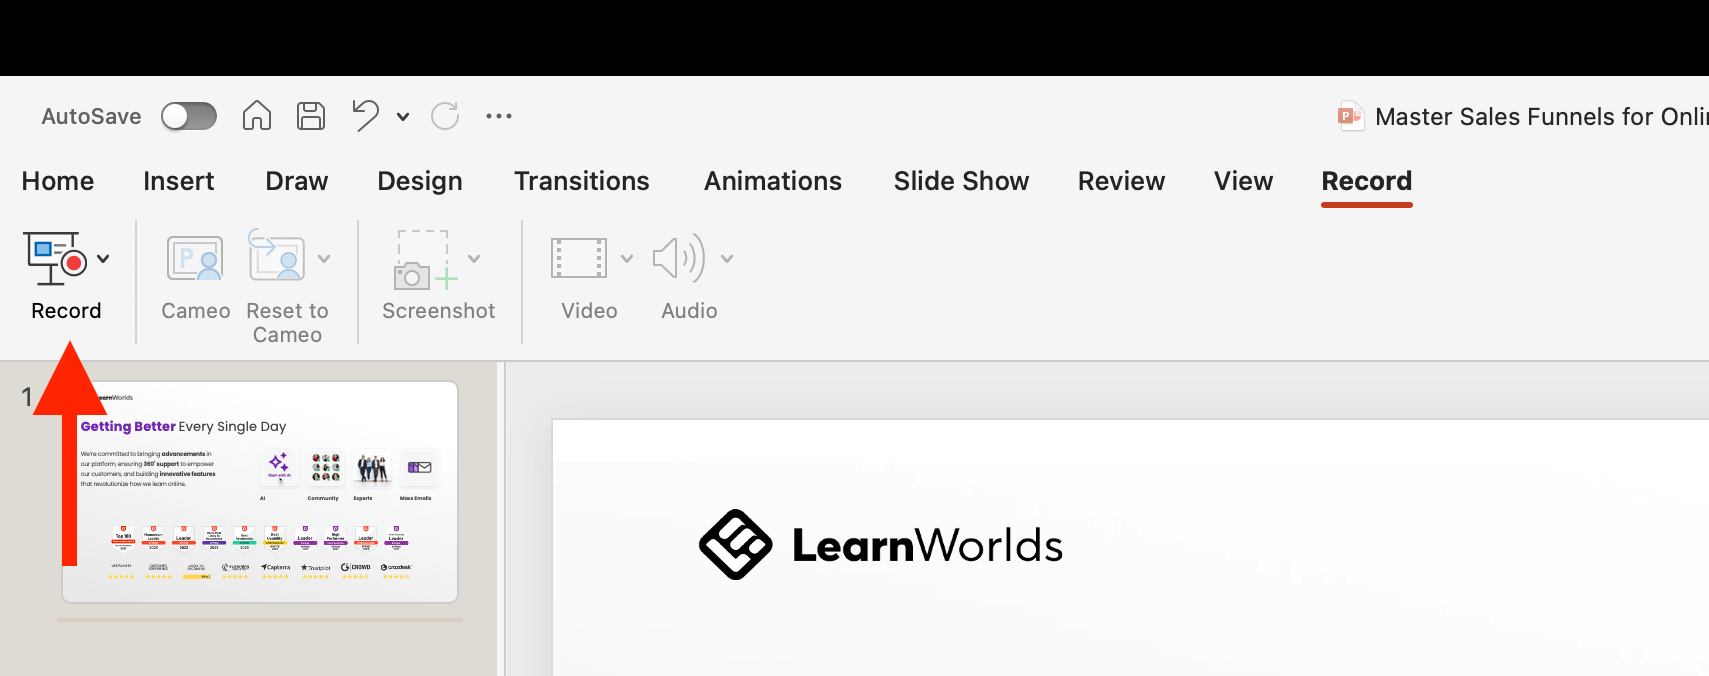
Go to the Record tab
PowerPoint on Mac has a dedicated tab for recording. Find it at the right side of your toolbar.
Record the Presentation
The next step for recording your slide show is to click on the record icon on the left. Click on the icon with the red circle to bring up the full-screen presenting mode.
Control the presentation, slide transition & timing
You can choose whether to show your camera, mute the microphone, use the highlighter, or change slides while narrating.
You can monitor the time you spend recording, and you can record, pause, or stop the recording at any time. The transcript helps to record the narration by reading while recording.
When you press record, wait for the countdown timer and then start speaking.
Cameo on Mac
You can use the Cameo feature to add a video recording of yourself to the presentation.
Use the audio button icon if you just want to insert audio. You can play the audio while presenting a slide live, instead of recording a voice-over.
Replay the video to ensure it was recorded correctly
Before you end the slideshow (End Show option), watch the playback to ensure you have a high-quality recording.
Export Video File
Mac’s “File” toolbar is hidden, so you need to move your cursor out of bounds on the top of your screen to find the “Export…” option.
Choose “File” above the toolbar, and then “Export…”

Choose Destination
Next, choose a destination for your video file.
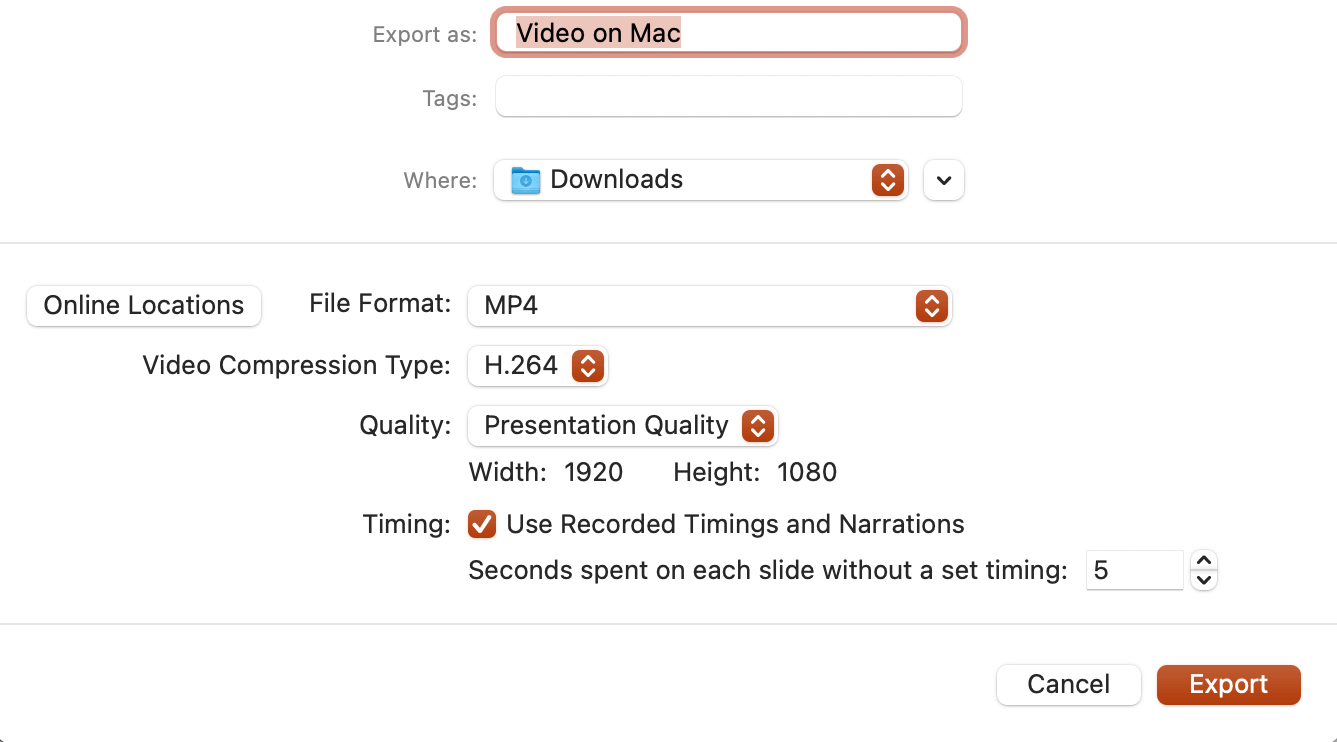
Customize Export: Compression, Format, Quality, TImings & Narration
Choose the format (MP4 or MOV) instead of a PowerPoint file, the compression, and presentation quality. Be sure to customize the settings to your liking.
Edit the Recording
Be sure to trim pauses, and do some editing of the video. This is especially important for longer videos for a more professional output. Consider hiring a video editor for better editing.
Upload to your LMS
For video training or courses, you will need somewhere to host and deliver your videos to your learners.
LearnWorlds is our recommended best learning management system, you can easily upload your video as a course or any other training material. It comes with everything you need to create and sell online education out-of-the-box.
You can try LearnWorlds a 30-day free trial:
Additional Tips for Recording Audio on Powerpoint
After many meetings, recordings, and live webinars I have hosted over the years, I came to understand the huge importance of high-quality audio in any live interaction,
Before you start recording, be sure you are ready with the right video lighting setup and microphone setup.
You will need to be ready:
Additionally, be sure your face is well-lit, and for more professional setups, you may need to buy lights for your video recordings.
Recording your presentation comes with many advantages, like making it more engaging and getting to be “present” even asynchronously to your audience.
It makes a huge difference, especially when taking your training material from offline presentations into online courses!
Frequently Asked Questions (FAQs)
How do I record a PowerPoint presentation as a video?
PowerPoint includes the built-in ability to record video in slideshow mode and record both audio and your webcam for a more personalized experience.
Can you record a PowerPoint in presentation mode?
Yes, there is a tab dedicated to recording videos in PowerPoint without any additional plugins.
Can you video record yourself on PowerPoint?
Yes, PowerPoint allows you to use the Cameo feature to either add video to your slides or record the presentation while you narrate it.
How do I convert a PPT slideshow into a video?
You will need to record a narration on top of your presentation. You can skip the narration and just record the slides with a transition to create a video.
Can PowerPoint record computer audio?
Yes, you can record audio from your microphone.
How do you add audio and video to a PowerPoint presentation?
You can either record and insert it at that moment or import video and audio from your computer to PowerPoint by clicking on the “Insert” tab.

Nick Malekos is a Senior Digital Marketer in LearnWorlds. He is a results based and well-rounded Digital Marketer with years of experience in the education industry, writer and digital literacy trainer.