Table of Contents
In this era of digital transformation, we are witnesses to a paradigm shift in the way knowledge is imparted.
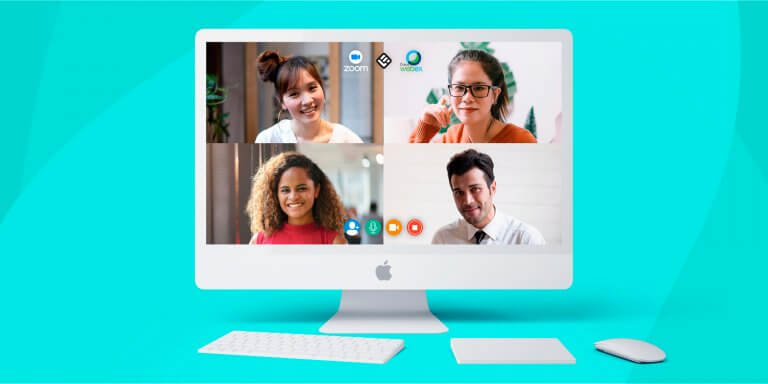
As technology continues to reshape the educational landscape, live online classes have emerged as a powerful tool for fostering interactive learning experiences.
Harnessing the potential of software like WebEx, Zoom, and Skype, educators can now seamlessly connect with their learners, bridging the physical divide and opening up a world of possibilities.
🔥 But here’s the burning question: How do you ensure your transition to online teaching is not only seamless but also successful?
If you’re looking for the right answer, then you’ve come to the right place! This blog post is here to empower you with 12 easy steps, serving as your guiding light on the path to creating awe-inspiring live classes.
Let’s dive in and unlock the secrets to crafting extraordinary live classes that will captivate and inspire your learners.
Table of contents
- Step 1: What is the Difference Between Online Courses and Live Online Classes?
- Step 2: Choose the Best Session Format
- Step 3: Create a Comprehensive Lesson Plan in Advance of the Course
- Step 4: Schedule a Practice Meeting
- Step 5: Choose the Right Equipment
- Step 6: Use Good Lighting Techniques
- Step 7: Actively Involve Students
- Step 8: Write on the Board
- Step 9: Learn Other Options in Your Online Learning Platform
- Step 10: Start your Live Stream
- Step 11: Hit the Recording Button
- Step 12: The Live Classes Checklist
Step 1: What is the Difference Between Online Courses and Live Online Classes?
It would help if you had clear in your mind when you turn your teaching online because there are two forms of online instruction: Asynchronous and synchronous teaching.
When online courses are delivered asynchronously, students learn on their schedule (self-paced learning) without any real-time instructor.
The course content (video lectures, tests, quizzes, homework, and assignments) can be accessed by the students at any time, as long as the course is active and available.
When online courses are delivered synchronously, students and teachers meet together to communicate with voice, video, and, optionally, a whiteboard.
Live online classes, on the other hand, require students and instructors to be online at the same time at a specific hour.
Some asynchronous courses may also contain live online classes as part of the course activities. So, don’t worry about your course format yet, because most online learning platforms provide the possibility to host both synchronous and asynchronous classes.
Step 2: Choose the Best Session Format
The next step is to choose whether your live class will be a webinar or a meeting. Both formats allow you to interact with students, but they have some differences.
In webinars, participants are view-only attendees and can watch a presentation with no screen options, video, or audio sharing. So, if you want to only present information, create a webinar.
If you want to somehow collaborate with the participants, then you have to create a meeting.
Take a look and decide what suits you best for your course:
| Meetings | Webinars | |
|---|---|---|
| Purpose | Collaborative events | Lectures, presentations, panel discussions |
| Who can share their screen? | Any participant | Only hosts and panelists |
| How can participants ask questions? | Using microphone | Q&A |
| Is recording available? | Yes | Yes |
| Are breakout rooms available? | Yes | No |
| Is file transferring available? | Yes | No |
*The above table is based on using Zoom as the conferencing solution.
Step 3: Create a Comprehensive Lesson Plan in Advance of the Course
Just like your face-to-face course, you need to have a plan with a clear structure in mind. Just putting content online isn’t enough by itself, right? There has to be a specific lesson plan for delivering training material.
First of all, you need to pick up a robust online learning management system that will help you build your course step-by-step. LearnWorlds, for example, lets you host all training material and, at the same time, run webinars and seminars.
You need to have specific learning goals in mind and make sure you always achieve them in your live session.
For example, things you need to have answered before structuring the course are:
Who will take the course.
What objectives do you want to address in the course.
How you will assess students’ learning in the end.
You can also draw several solid lesson plan templates online, both from traditional teaching settings and more diverse digital course settings.
Step 4: Schedule a Practice Meeting
Before your official meeting, it would be wise if you set a practice meeting with a colleague or a family member to practice screen sharing and chatting with the webinar software of your choice.
This way, you can work through any hiccups before you’re ready to start with your live classes!
Try also the in-meeting chat. This excellent feature allows the participants to send instant messages and files during a meeting, either to one or all participants.
Of course, you can always choose to disable this feature or decide who the participants can chat with.
You can also have all chat messages saved in the meeting settings before starting or during the meeting.
Read also our experts’ discussion about rising trends in webinars.
Step 5: Choose the Right Equipment
To get started with your live classes, you will need a camera and a microphone.
Try the quality to match that of a real classroom, so students don’t lose focus.
Here are a few pieces of equipment that are worth investing in (remember they don’t have to be professional-grade):
If you only want to have a slideshow presentation on-screen and live audio commentary, try using Wirecast Desktop Presenter plug-in or a screencasting tool that offers screen-sharing capabilities and is perfect for lecturing with a visual presentation.
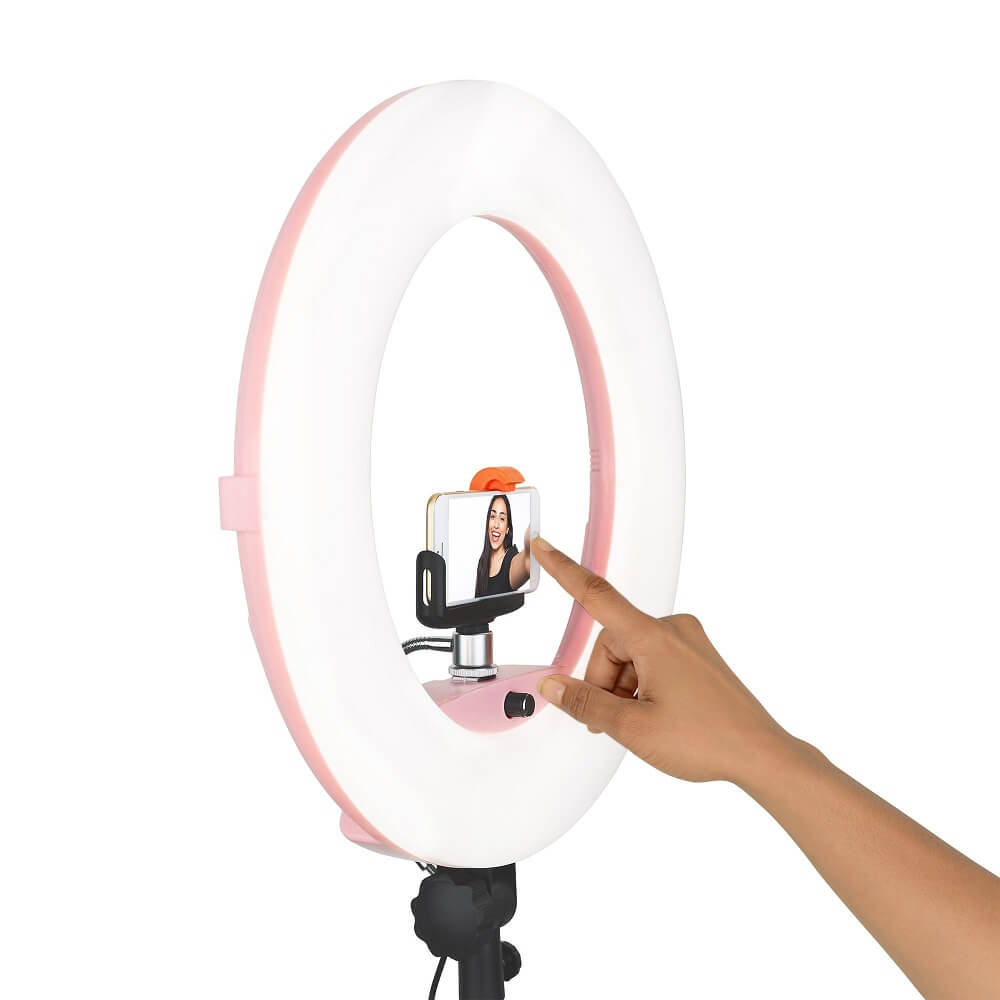
Step 6: Use Good Lighting Techniques
Good lighting is one of the most critical elements to looking professional in your live classes.
Fortunately, getting great lighting isn’t hard to do. You can use a simple ring light (a circular light attached to a tripod with your camera positioned in the open center space of the light).
Another option is office lamps. You can place the lamps on each side of your camera and point the light toward your face. And if the light is too harsh, you can use some diffusion material (e.g., white kitchen roll) to hang with clothespins over the lights.
Natural light is the best choice if you want to avoid costs. Pick a brightly lit spot to record with the light source facing you rather than coming from behind you.
Use a piece of aluminum paper to reflect the light coming from the window and point it to the darkest side of your face. Just like this, shadows disappear. Instead of a piece of aluminum, you can use a lamp from your house or another professional reflector.
.

💡 For more lighting techniques visit our blog post “How to Choose the Best Lighting Setup for Your Videos”.
Step 7: Actively Involve Students
During live classes, there are plenty of ways to get participants actively engaged. And keeping students engaged is crucial to get them to come back for more.
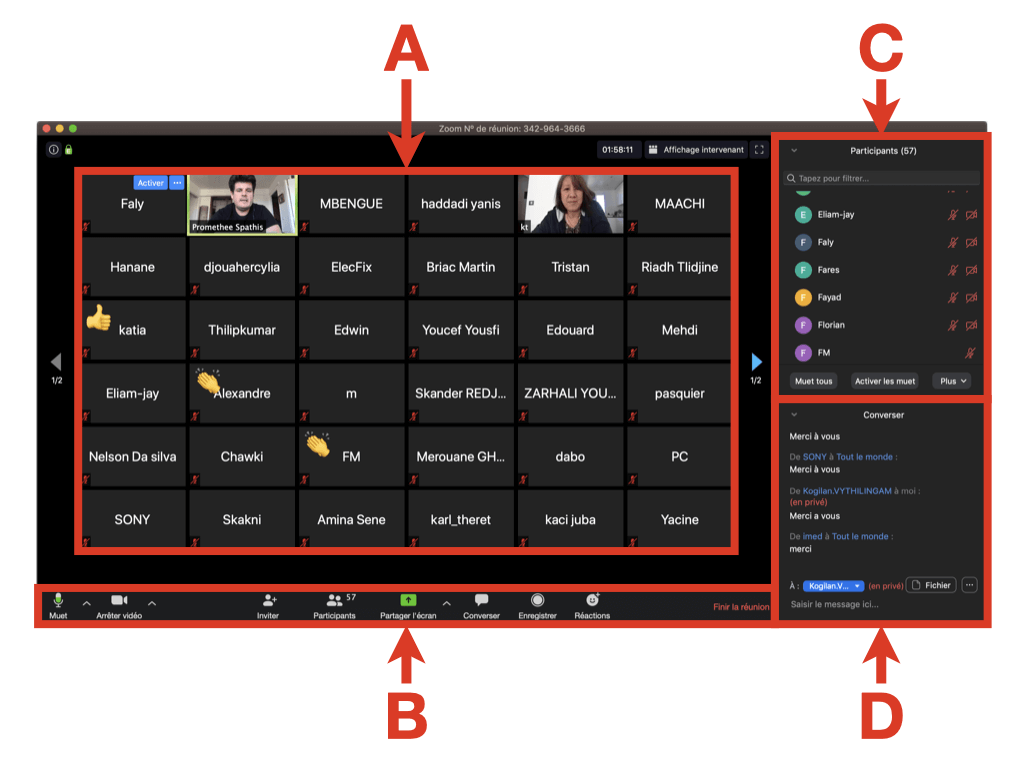
In Zoom, for example, you can ask participants to raise their hands to ask a question or use “reactions” to clap or give a thumbs up regarding a question or assignment. The reaction disappears after 5 seconds.
Other creative ways to draw students into the content while using Zoom are:
You can also save the results by downloading a report available after the meeting.
Step 8: Write on the Board
What’s common in live classes is screen sharing. And it’s a fantastic feature! You can show slide show presentations either on full screen or simultaneously with the active speaker in a window.
You can also share the screen captured by a secondary camera (for example, you can join your Zoom meeting on your phone to be able to use its camera as a second camera).
Zoom also provides a whiteboard with several drawing tools. You and your students can (if enabled by you) annotate the content shared on the screen using text, lines, arrows, shapes, or a highlighter. You can learn more about whiteboard annotation here.
You can save the screen with all annotations, which will be captured as screenshot images. Keep in mind that the whiteboard feature is used at its best when you use a tablet and a stylus.
Step 9: Learn Other Options in Your Online Learning Platform
Zoom is one of the most effective online training tools for live classes. This is why LearnWorlds – one of the best online learning platforms – has integrated Zoom into its environment.
In LearnWorlds, you can either create Zoom meetings or Zoom webinars, which I love about the platform. You can also use a setting named “Join Url,” so students can join the live session through their native Zoom client instead of watching it inside the LearnWorlds environment.
But, there are two other ways you can run live classes in your course:
1) You can use WebEx. You can now get your Webex up and running through their online school in literally five clicks (Read more here) or
2) You can embed a live YouTube video using a few simple steps.
Step 10: Start your Live Stream
Once you feel comfortable, you can schedule your first meeting. Do this on your Learning Management System, and send the link to your students.
Decide if you want to allow students to share their screens before the meeting starts or if only you will share your screen. Also, you may want to mute all participants/some participants during the live session.
When you start the meeting or the webinar with Zoom, you can screen share or use a document camera to share valuable content.
P.S.: You can always change your virtual background just for fun. You can select one of the preloaded backgrounds or upload your own.
Step 11: Hit the Recording Button
You will probably want to hit the record button, so some students can later access the live class (for Zoom, all records are available at zoom.us/recording).
Record to the Cloud, rather than on your computer. It’s convenient to record to the cloud, as you can receive both a URL to the video and an interactive transcript. Cloud recordings include four file types:
Make sure you start recording in the right layout: You can decide if you want to show the active speaker, the gallery view, or the presentation only.
And a small detail here: If you set your meetings to record automatically, make sure to uncheck the “Enable join before host” option in your meeting’s settings so that recording doesn’t start earlier from students’ screens.
Tip: The recording can be later edited and uploaded for your students to revisit or as a new video for your self-paced students.
Step 12: The Live Classes Checklist
Now that you’re established, why not try an online learning platform to see how things work?
You can start with a 30-day trial for free in LearnWorlds and see whether it works for you!

Kyriaki is the Organic Content Strategist at LearnWorlds, where she writes and edits content about marketing and e-learning, helping course creators build, market, and sell successful online courses. With a degree in Career Guidance and a solid background in education management and career development, she combines strategic insight with a passion for lifelong learning. Outside of work, she enjoys expressing her creativity through music.