Table of Contents
One of the most significant factors that makes a video look professional is lighting.
It doesn’t matter how much money was spent on a camera or lens.
Good lighting is one of the most critical elements to create great footage and looking professional.
Whether you are creating online courses, YouTube or TikTok videos, or do professional video production, lighting can make a huge difference.
Fortunately, getting great lighting isn’t hard to do.
Following some basic lighting rules, you can get impressive results from even the cheapest lighting kits!
Table of contents
Shooting Videos Indoors
Shooting videos indoors or outdoors requires different lighting options. Most videos for podcasts, vlogs, education, and many corporate videos like training videos tend to be indoors.
Especially videos with the presenter directly speaking to the audience are often shot while sitting in an office or indoor space.
Here is what you need for your video lighting kit to shoot an indoor video:
Camera vs WebCam
Choosing a camera for video shooting or a webcam for webinars or Zoom or Lives is the essential first step.
Many webcams come with a built-in light or automatic light-balancing feature, but you will still need a ring light or other lighting sources in most cases.
My personal favorites that I use right now on the medium-price level are:
The GoPro is a bit tricky to set for indoor recording and live videos, but the video quality is great. It’s even better for outdoor shots, though. For indoor shots, you will need to set it up correctly and manage the settings as the video files are huge!
The Logitech C922 is a perfect mid-range camera for meetings, webinars, and simple indoor recordings. It allows for auto-focus and light balance, while recording a 1080p HD video.
But, you can find the best video cameras for vlogging and our course on Course Masters for your DIY video equipment to help you choose the best one for you.
Ring light
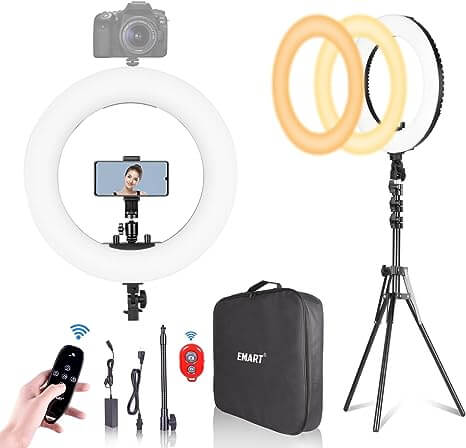
For many people who sit in front of your camera, the most common light source they use is a ring light. A ring light is a circular light (usually around 20 inches in diameter) which can be attached to a tripod with your camera positioned in the open center space of the light.
Ring lights are great. They cast lighting evenly and eliminate harsh shadows.
Ring lights come at all sizes & budgets. You can start as low as under $20 for beginner ring lights or look for high-end ring lights at north of $100.
You can also choose ring lights that work well for your smartphone. I am using a low-end smartphone holder + light setup for video stories and the results are great.
Tabletop studio lights
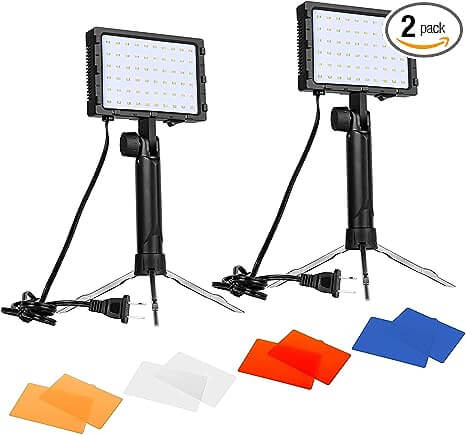
Shooting a video from your office requires a different kind of lighting. This is why a tabletop studio light will make the difference to create an ambient light atmosphere.
It’s better to have two light panels instead of one, as two light sources will help balance the scene and won’t create shadows.
Emart has another of the best video lighting solutions for this situation, you can follow the link above to get it from Amazon.
A lantern setup
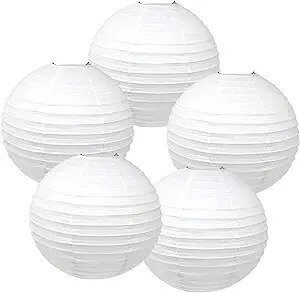
Another smart option is to put two white paper lanterns right over your desk, mostly behind your computer. Maybe you’ll have to use a light socket and some stand to hang them.
With this equipment, you can get a beautiful soft light.
It’s also a relatively cheap way for great lighting for a home video studio with led bulbs. You can even use it for other indoor shooting and filmmaking or use colored ones for lighting effects.
Two simple lamps
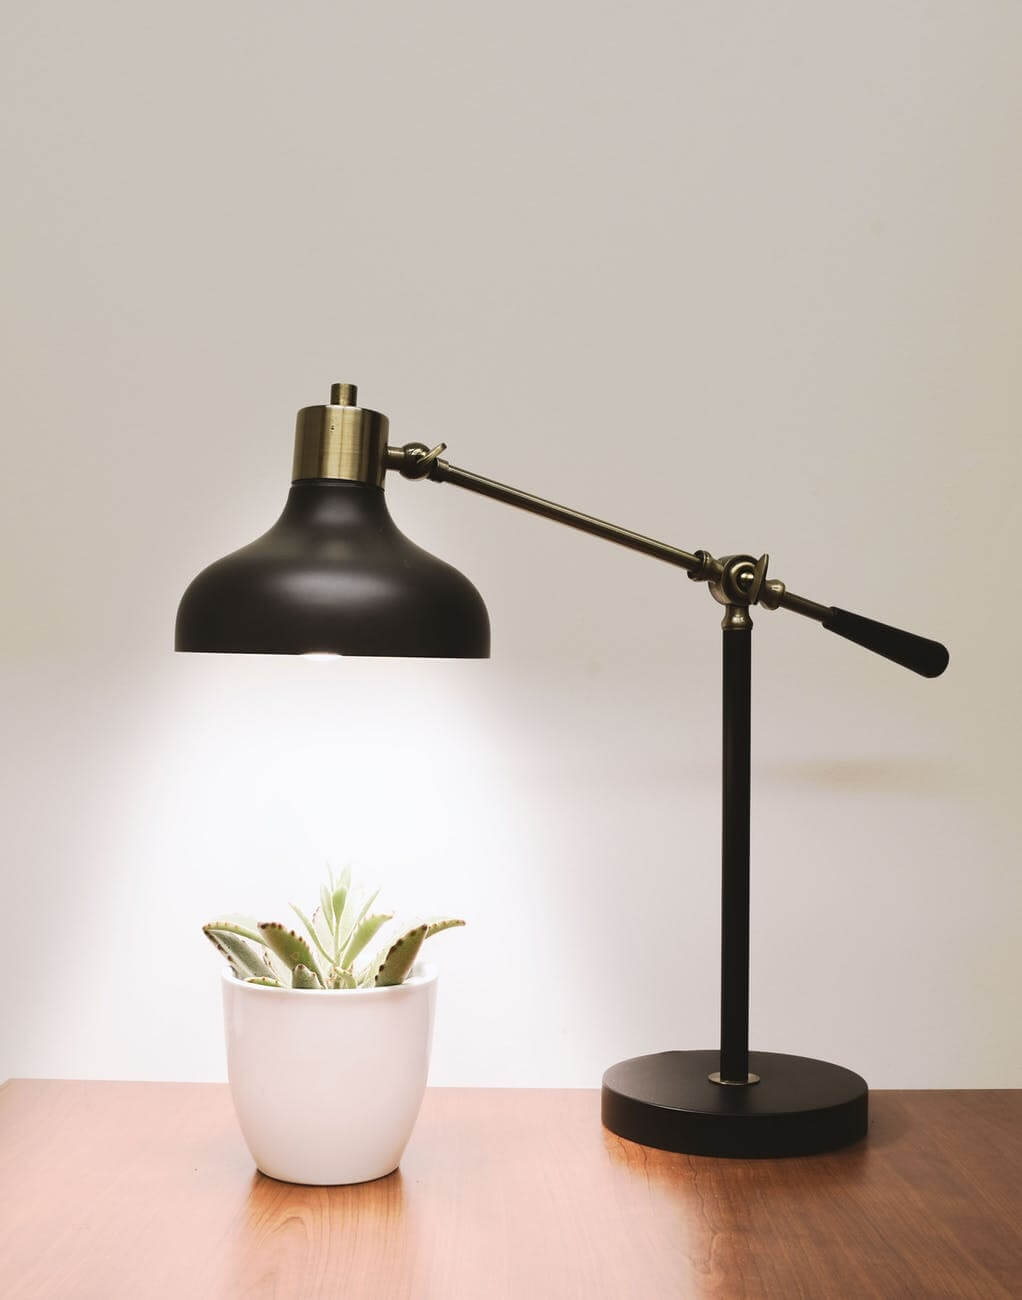
Office lamps are available in all houses and may be the best choice if you want to avoid lighting expenses.
Place the lamps on each side of your camera and point the light towards your face. If the light is too harsh, you can use some diffusion material (e.g., white kitchen roll) and hang it with clothespins over the lights.
I have used this setup in live streaming and video recordings and works well, but requires some work to get it right 😉 Test it with a few different options until you get the result you like!
Using Multiple Technical Lights
Let’s suppose you are a content creator shooting a talking-head video while you are standing in your room. If you are using more props like a whiteboard, you will want even more light to fill the room.
In case the room you’re recording gets little to no outside light, you will need a lot of supplementary lighting.
Studio lights will give you better lighting in this case, and improve the quality of the video. Studio lights can be used in different setups, giving different results.
Let’s look at some common setups:
Two-point lighting setup
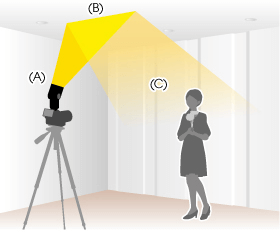
You can use two lights, a key light, and a fill light. The key light is the brightest of the two lights and serves as the primary source of illuminating yourself. The fill light complements the key light by softly lighting the parts of you not illuminated by the key light.
Fill lights are typically around half as bright as key lights and illuminate the harsh shadows. For a better result, lights should be placed higher than your height. Also, you should maintain a distance from the background to reduce shadows.
The setup: Place two lights on either side of you, just above the eye line. This setup will still be helpful even if there is some movement around the room and you are not facing the camera the entire time.
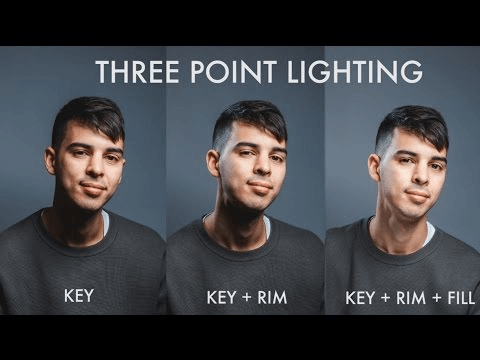
Three-point lighting setup
A new element you can add in your lighting setup is a third light as a backlight. If you put a light in your back (also known as rim light) pointing towards you, you can create beautiful highlights in your hair and body line.
This light also creates a separation from the background.

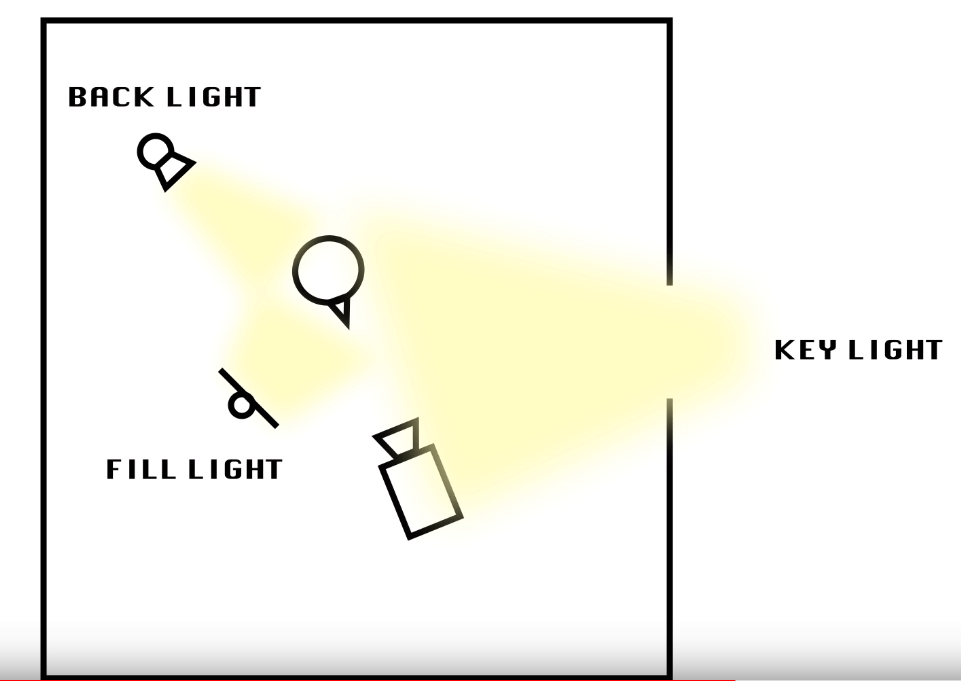
Four-points lighting setup
A four-light light setup includes apart from the key light, the fill light, and the backlight also a background light.
The background light illuminates any background you have, making the overall picture more beautiful. Position a fourth light on a fourth stand just behind you, facing the wall, at about waist height to get rid of any shadows that would otherwise fall onto the background wall or surface.
Depending on your space, you may not need the fourth light. However we feel that it is best to get a fourth light so that you always have it should you need it, or when you want to elevate the look of your video lessons further.
You’ll be surprised at how those four lights can dramatically increase the quality of your shots. If you need a specific type of shot, you can adapt your system by adding or removing lights to achieve various effects. It just depends on what you want your shots to look like.
For example, if you remove the fill light from the equation, you will get a more dramatic look with shadows taking over half of your face. Some people like the look of having a harsh shadow on their face, where one side is lit very well, and the other side isn’t.
Others prefer a more consistent, more even lighting to their videos, where there is not too much harsh shadow. But there is no right or wrong with this!
It is a creative process.
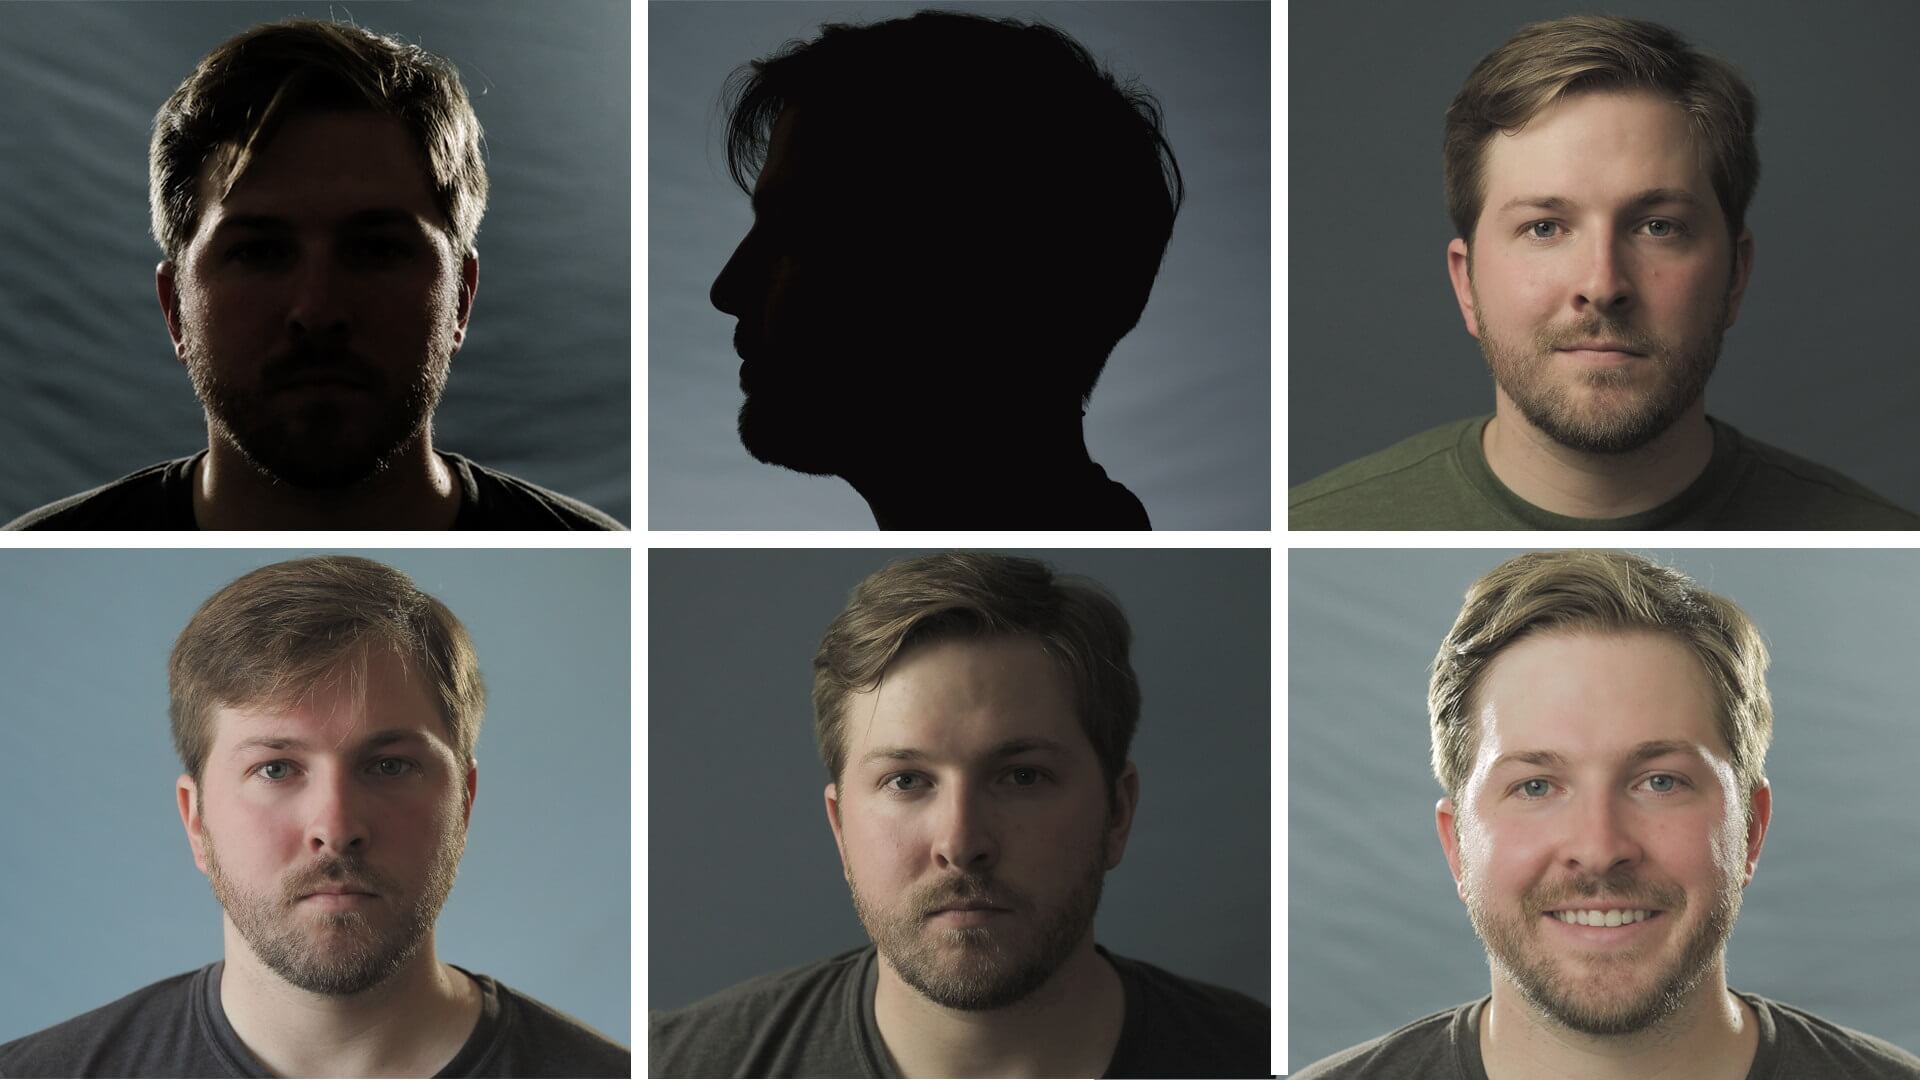
If you’re just getting started with lighting, you can get by with a two-point setup that uses only the key and fill lights. While the backlight and the background light add a nice depth to your picture, they are not necessarily essential.
Remember: The most important thing is to lighten yourself up very well, as you are the main subject of your video which delivers the content.
My lights are too harsh. What can I do? (Light Quality Issues)
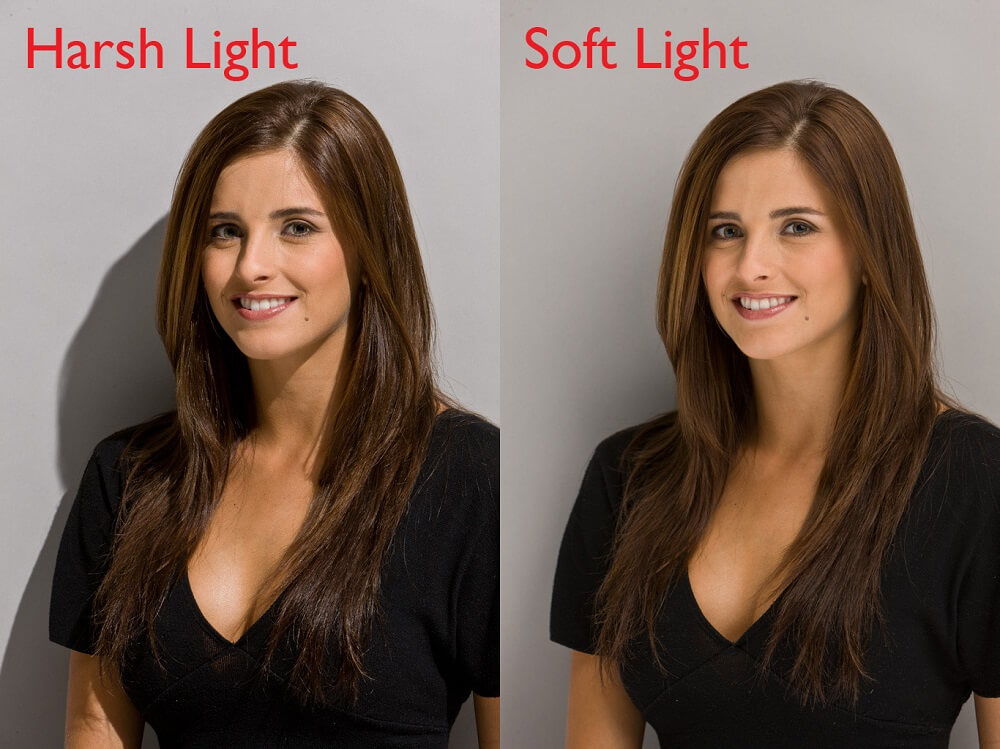
Light quality refers to how harsh or soft the light is. There’s a vast difference in the image when you use a harsh light versus a soft light.
The secret is to look at the shadows. If there’s a clear, distinct line along the shadow’s edge, then it’s harsh light. Harsh lights create harsh-edged shadows.
If the shadow has a soft edge that gradually fades out of the shadow area, then the light source is a soft light. Soft lights create soft-edged shadows.
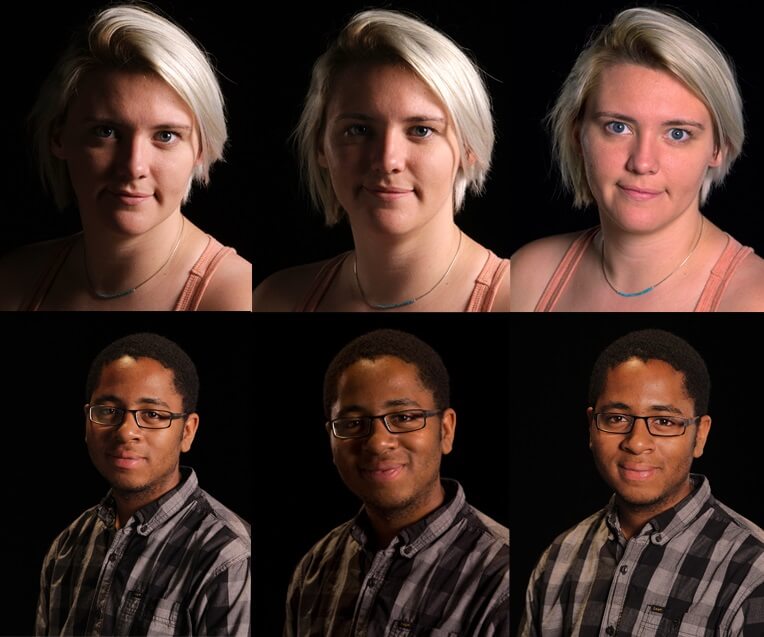
Generally speaking, people usually look best under a soft light.
Most of the time it’s a good idea to use soft light for your key and fill lights. This provides an evenly lit shot.
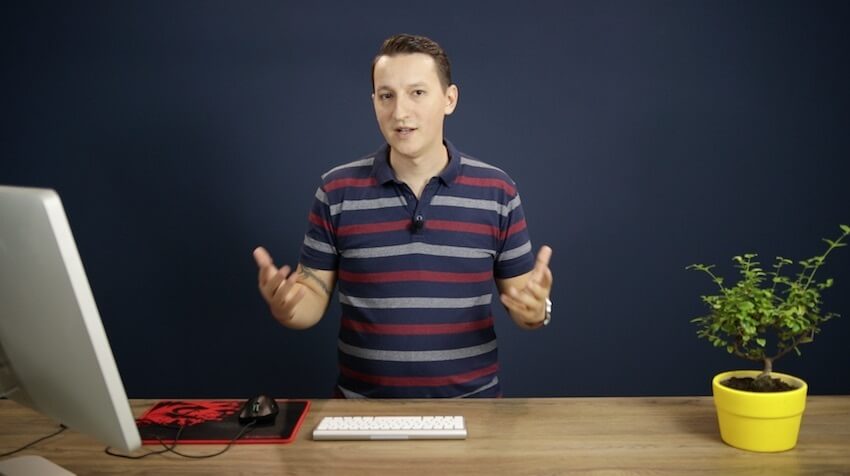
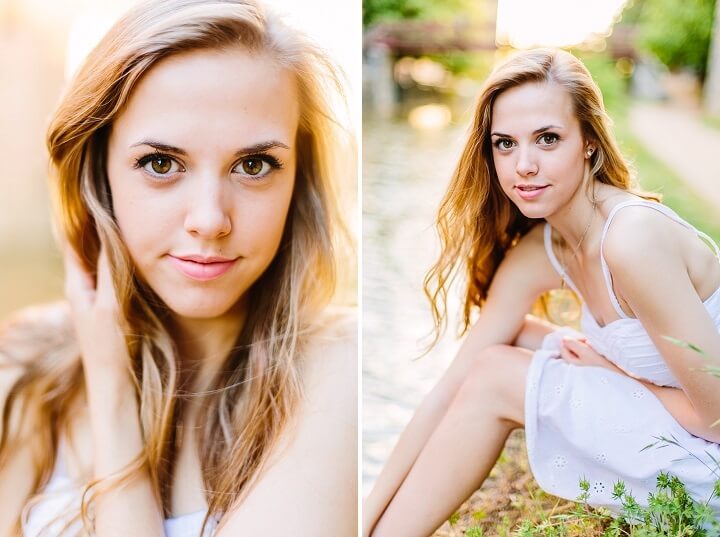
Beauty shots, for example, benefit the most from using more soft light, like in the image below:
On the other hand, harsh light is effective for backlights pointing on your background because you want to create sharp, distinct edges. Harsh lighting also provides the contrast you’d find in natural lighting, so it’s best to use it when you want your lighting to look like it’s not coming from lights.
How do I change a harsh light into a soft light?
With a lamp dimmer and dimmable bulbs you can have the ultimate lighting control. With these accessories, you can easily adjust the amount of light hitting you. Be careful, because if you buy non-dimmable bulbs, they will flicker as you dim them.
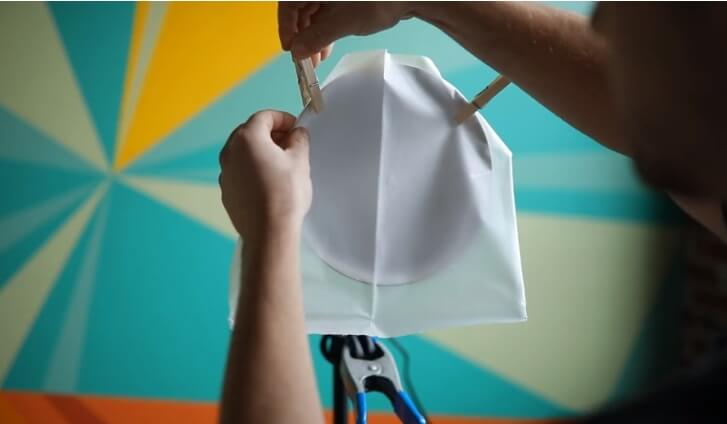
If the light is too harsh on its own, put some diffusion material in front of the light (for example white kitchen roll or a piece of a white shower curtain). This way, the harsh light becomes softer.
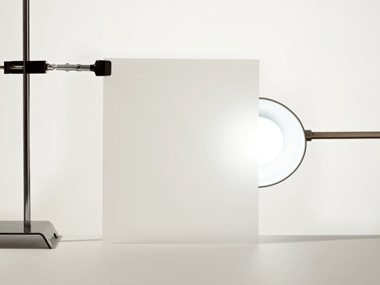
Alternatively, you can bounce lights off a surface (a wall, ceiling, or reflector) to create soft light.
When you reflect light to a wall, you create a softer lighting.
If you still can’t achieve a soft light with the above techniques, try making the lights larger. The light becomes softer as the light source becomes larger. Lights become larger when you put them farther from where you had placed them.
Light temperature is another thing you need to keep in mind. Not all lights are created equal. Some lights appear “cooler” and other “warmer” on camera and the human eye as well.
This concept is called color temperature and can be measured on a scale of Kelvin.
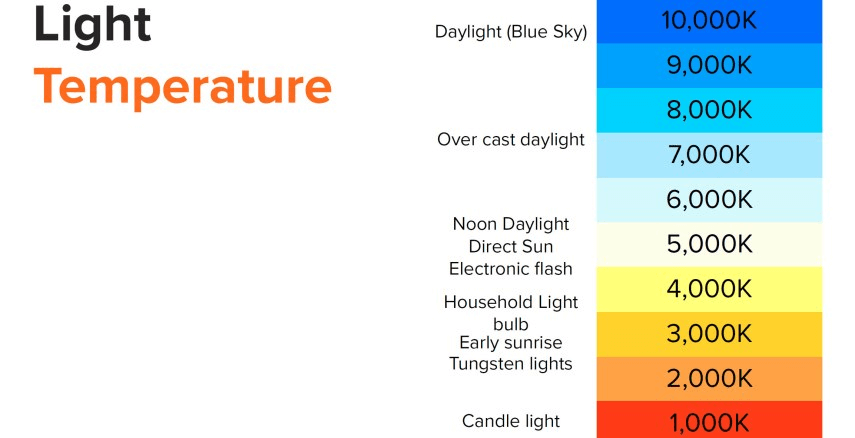
It’s best not to combine lights of different temperatures because this can lead to improper color balance and unnatural looking footage. Light bulbs are considered daylight balanced at 5000 Kelvin and have a high color rendering index (85+).
This will help you produce the highest quality and most flattering light possible.
Video Lighting Tools Recommendations
No matter your budget, there are some solid options in the market:
Low budget
For your key light, choose a larger clamp light and a smaller one for fill and backlight.
This 8.5” clamp light is ideal for most scenarios.These lamps are versatile and can be mounted in a variety of ways.
For diffusion material, use a white curtain to soften the light.
What bulbs should I use?
Incandescent Bulbs cast a warm glow but are the least efficient, and have been banned in the USA and other countries. Halogen bulbs also expect restrictions and bans.
Compact Fluorescent Light Bulbs. CFLs are the most efficient. The bulbs last much longer than incandescent, and they use less electricity too. They tend to emit a cold light, so they’re perfect for canceling out their shadows. The Kino Flo 26 watt CFLs are excellent.
Whichever you choose, remember that it’s best not to mix lights of different color temperatures.
Medium budget
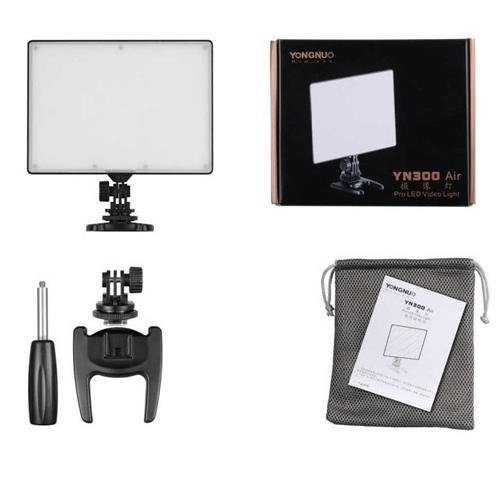
Yongnuo Yn300 Air Pro LED light Controller are really nice soft lights that can be either powered by batteries or plugged to the wall but the price is a little higher ($59). In this case, you don’t need diffusion material.
Higher budget
Your next option is studio lights. Studio lights provide everything you need to set up. You can find a cheap RGB kit under $50, but quality studio lights kits start around $70.
These kits commonly use large lights and include useful diffusion material and light stands. In these lights, you can often control the number of lit bulbs you want to light. For this setup, you can still choose between incandescent, halogen or fluorescent light bulbs.
And you can find many more features like the ability to change color on the fly, better diffusion and stronger output.
Shooting Next to a Window = Zero Cost Lighting
Natural light is the best choice for no-budget lighting.
Pick a brightly lit spot to record (the lighter, the better), with the light source facing you rather than coming from behind you.
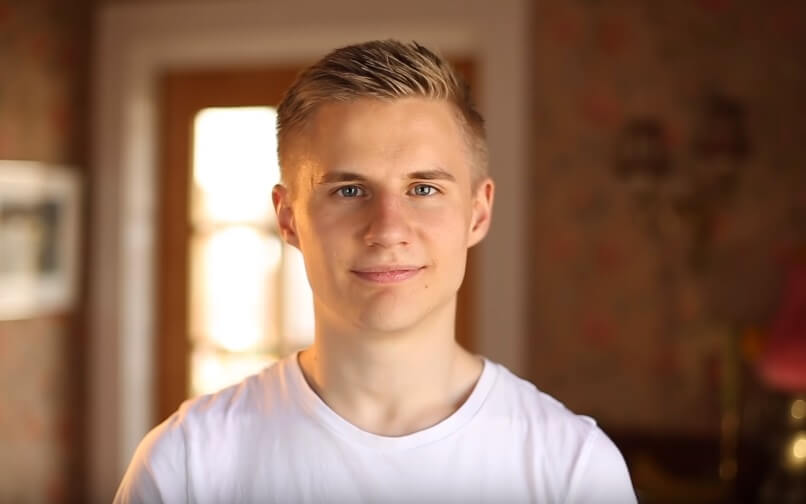
The light will be most flattering when it is a soft light. Try to use a curtain to diffuse the light and soften it up. To help you understand how window lighting works we will use Andyax’s example:
The window light works as the key light.
This might create harsh shadows on the other side of your face that is not lit. To avoid shadows, you can shoot directly in front of a large window.
Alternatively, use a piece of aluminum paper to reflect the light that is coming from the window and point it to the darkest side of your face.
You can work with DIY home lighting equipment to reduce costs. Use natural light sources, and natural reflectors to light your subject’s face.
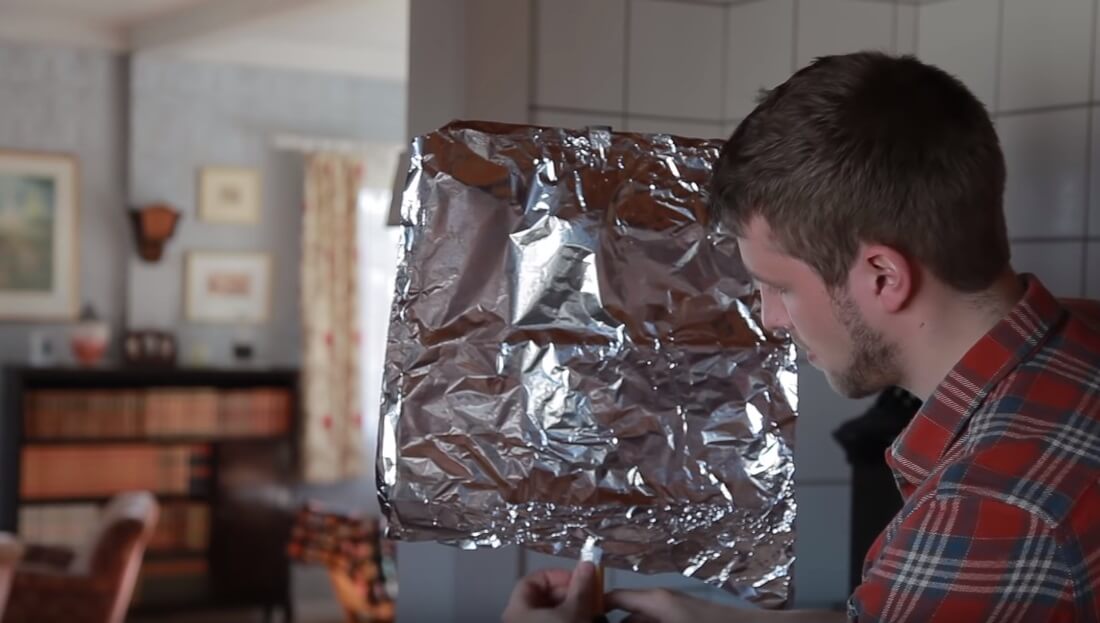
These zero cost lighting tips will help you achieve great effects for a lower cost when you are starting out. That said, a lamp or a professional light deflector can be better alternatives.
If you have got an extra lamp, put a third source of light (either a lamp or a reflector) to lighten yourself from the back.
So, the final setup of lights will look like the picture above, where the key light derives from the window.
The easiest, and arguably the best type of lighting will be natural light.
So long as your shot looks natural and relatively shadow-free, you’re golden.
You should be very careful, however. The sun moves and can make it difficult to achieve consistency in your shots. But, with careful planning and adjustments as needed, you can certainly use natural light sources for your videos.
Backdrops for indoor shooting
While your viewers will mainly see you, you are not the only element on camera. Any components that appear in your background help create the overall style you’re presenting.
Make a point to ask yourself, “What does my backdrop say about me?” before selecting your choice. Also, before shooting, we believe you should study ways to improve your photography and photography composition rules that will help you better direct your shots.
Which are the most popular ways instructors use backgrounds? Let’s see some common solutions that might inspire you:
Your office or bedroom: The simplest background is a tidy room. A tidy room allows you to shoot yourself even in front of your office. Seeing people in their natural environment feels genuine and adds a sense of time and place to the scene. A natural backdrop stand feels spontaneous, rather than like an artificial setup. Also, if you have a unique home, office, etc., this is an opportunity to get people interested in what makes you unique!
Look for areas and settings that are dynamic, and have corners, angles, and colors. Don’t use the head on a wall shoot, instead use unique perspectives to add depth to your videos.
Look for other objects (lights, vases, flowers, etc.) to balance out your shot, but never distract!
If the background doesn’t look exciting or isn’t essential to the story, use a fast lens like a 50mm and blur it out. This keeps the focus on you and away from what’s happening behind you.
Here are a few great ways to replace your background for shooting:
Fake background: If your home furniture doesn’t allow a nice-looking shot, it is better to create a fake background in a corner of your home. A fake backdrop has a professional and clean look.
Fake office background: There are plenty of fake office backgrounds that look professional. You can find ready-made home office photo backdrops on Amazon or choose a green screen background.
Solid color background: A solid color background is perfect when you want to easily add other text and graphics on the screen beside you.
Blanket or sheet: It sounds simple, but hanging a solid-color blanket behind you can look really polished and professional. Make sure that this blanket is not too distracting.
Plain wall: If you have a plain-colored wall anywhere in your house, you could just film in front of that. To get the best quality possible, sit a foot or two in front of your wall, so the camera blurs it out a little bit.
Collapsible background and green screen: Made of neoprene, nylon fabric and available in all colors, this accessory is perfect for anyone who wants a professional web presence.
Professional background: For a professional background set-up, you’ll need a bigger room to build a studio.
Whiteboard background: A traditional background for educators and course creators is the whiteboard. A whiteboard allows you to explain the basic concepts of your lectures and sometimes is essential if you want your students to remember essential things.
The most significant challenges of shooting in front of a whiteboard are the reflections and glare. However, if you place your lights carefully, you can avoid those reflections.

Shooting Outdoors
Video shooting under the continuous lighting of the sun with a real or natural environment makes an excellent choice for video production.
The downside of outside shooting is that the sunlight is brighter and this makes it harder to control the hardness of its light.
However, with the right equipment and nailing the right hour of the day (and weather), you can have great soft light and no shadows at all on your face.
Equipment For Outside Shooting
ND Filter
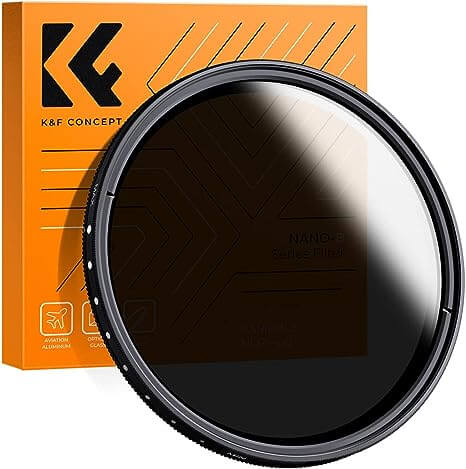
If you do more shots outside, picking an ND filter will help you get a well-balanced shot. ND filters darken the video image and help you maintain the depth of field you want (thus keeping the camera settings) while at the same time let you darken your image, making the back and foreground adequately exposed.
Some cameras have ND filters built-in, but if you are using a DSLR camera, most of them don’t come with that option. So, you need to pick an extra filter.
Reflectors
When the sun is in front of you, you’ll notice more harsh shadows, and when the sun is behind you, there is the risk of being underexposed. In both of these scenarios, reflectors can help to bounce or diffuse light. If you’re starting to shoot outside more, consider picking up a 5 in 1 reflector.
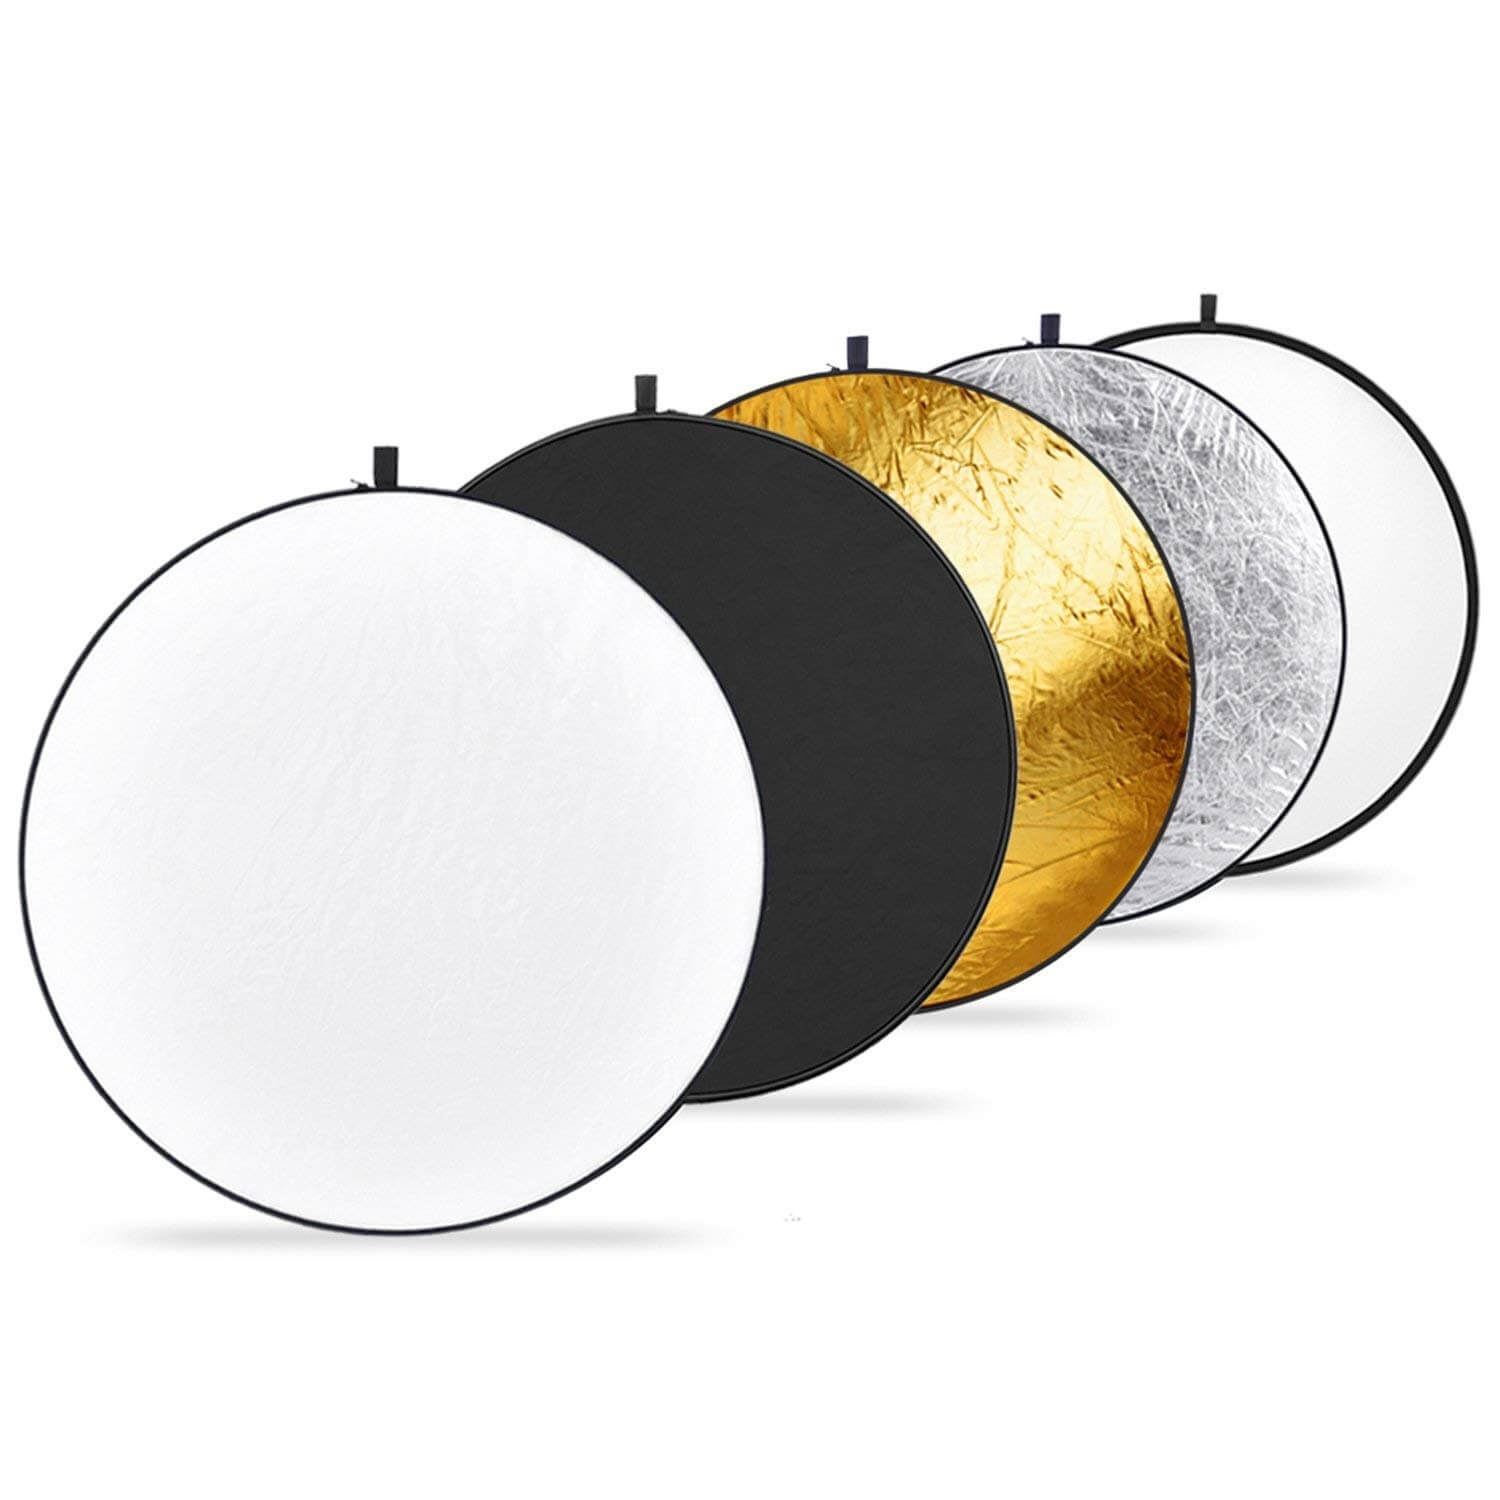
Why are there different colors in reflectors?
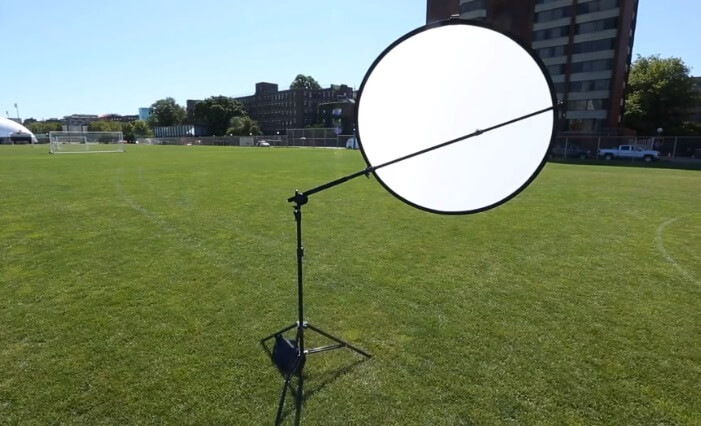
If you are shooting solo we recommend that you buy a reflector stand:
For a lower budget, an aluminum paper can work as a silver reflector as well.
Shooting on a Sunny Day
Let’s go through some different scenarios that may occur when shooting outdoors on a sunny day and how to handle different situations.
The light is coming from the front of you
Shooting in the middle of the day is the most challenging. It will give you the harshest shadows and highlights on your face. If the sun is in front of you, you’ll want to take the cover off the reflector and diffuse the light. Put the reflector between you and the sun to diffuse the light and make it softer.
The light is coming from behind you
If the sun is behind you, you can bounce the light by using the white side of the reflector.
This will make your face look more appealing, and now you’ll be able to achieve a well-balanced, properly exposed shot.
If you need more light, try using the silver or the gold sides of your reflector.
In the high noon
Shadows are pretty harsh. You should try to diffuse the sunlight by putting the no cover reflector right above your head.

Even placing yourself underneath a shaded tree is a way of diffusing light. Ideally, the sunlight should be bouncing off a nearby building.
Shooting videos in the early morning or late afternoon (at 9 am or 5 pm) are great times to plan a shoot. There are fewer shadows, and you will have an easier time getting a good looking shot.
Shooting on a Cloudy Day
Clouds are a great source of diffusion that decreases harsh shadows in your shot. Mind that on a cloudy day, you might have moments of extreme brightness or extreme darkness.
The ideal scenario is one big cloud where you are probably going to have perfect lighting.
The Golden Hour
The Golden Hour is the time just after sunrise or just before sunset where the sun’s light is warmer and softer (lasts roughly an hour). This combination leads to more beautiful lighting. The light at that hour is more soft, and shadows are less harsh.
Overall, it will be easier to expose both sides of a person’s face during the golden hour.
However, shooting at that hour inherently has a short timespan for getting the right shot, making it impractical for long video shoots.
Extra tip: using the sun as a backlight
Whether you’re shooting at the golden hour or during the middle of the day, try using the sun as a backlight. By placing yourself in the frame with the sun lighting the back of your head, you typically get a nice-looking image.
With the sun as a backlight, you will be more separated from the background. This gives you a nice halo around you that also looks great! However, you must still use a reflector to lighten up your face.
Non-Lighting Tips: Before You Start Shooting Videos
Here are a few quick tips to follow before you even set up your lighting to create high-quality video recordings!
Declutter the Space Around You
Make sure that the background of your scene is tidy and well organized. Keep things clean and simple, focus the attention on you or the person on camera, and cover up a messy, unorganized background. Consider what’s in your shot. Take a minute to move any unnecessary or distracting items. Also, be mindful of mirrors or other reflective surfaces.
Props and Set Dressing
Prepare the appropriate pros or dressing for the set and anyone participating. Setting up the space to visual represent your scene is equally as important.
Background
Make sure your background is not distracting. For example, don’t have a curtain blowing in the wind or people walking by outside your window. Before hitting record, make a quick check to ensure nothing in the background is moving.
Avoid colors that stand out. Either have a bunch of complementary colors or have a few muted ones. If you have a single, large object in the background that is distracting, that can be tough for viewers to avoid looking at.
Lastly, consider the distance to the background.
Audio Considerations
Pay attention to the audio quality. Minimize background noise by choosing a quiet location, or using a lavalier microphone or an external shotgun microphone. Conduct an audio test to make sure there are no issues.
Camera Setup
Set up your camera on a stable tripod at the right height and angle for your shot. Make sure the framing and composition are well thought out before you start recording.
Test Equipment
Test all your camera and audio equipment, and be sure the batteries are charged or that you have access to a power supply!
Final Words
Lighting your video shoot can be tricky. Setting up the right lighting helps you better set the mood and tone and draw attention to the priority subject of the video-you. This will give you a better quality video to use and requires less video editing later on.
And, for an online course creator, it is essential to create an impact.
Effective lighting for your video is more about taste than owning the right equipment. If you follow some basic lighting principles discussed here, you can get impressive results even with a cheap lighting kit.
With the basics down, feel free to experiment with lighting that works for you. Try adjusting the different brightnesses and play around with the shadows and really get creative.
You may want to invest in gear that will give you complete control of how your scene looks. This will give you the ability to shoot no matter under any circumstances.
Still, using natural light is a viable option for you. Think again – natural light might be the desired look you want for your next course!
Frequently Asked Questions (FAQs)
My lights are too harsh. What can I do? (Light Quality Issues
Light quality refers to how harsh or soft the light is. There’s a vast difference in the image when you use a harsh light versus a soft light.
The secret is to look at the shadows. If there’s a clear, distinct line along the shadow’s edge, then it’s harsh light. Harsh lights create harsh-edged shadows.
If the shadow has a soft edge that gradually fades out of the shadow area, then the light source is a soft light. Soft lights create soft-edged shadows.
Generally speaking, people usually look best under a soft light.
Most of the time it’s a good idea to use soft light for your key and fill lights. This provides an evenly lit shot.
What is the best light for beauty vloggers?
The best light to create YouTube videos for beauty vloggers is soft light. Soft light is better to show a beautiful face, avoid harsh shadows, and improve the shot.
How do I change a harsh light into a soft light?
Using a lamp dimmer and dimmable bulbs you can have the ultimate lighting control. With these accessories, you can easily adjust the amount of light hitting you. Be careful, because if you buy non-dimmable bulbs, they will flicker as you dim them.
If the light is too harsh on its own, put some diffusion material in front of the light (for example white kitchen roll or a piece of a white shower curtain). This way, the harsh light becomes softer.
Further reading you might find interesting:
- 10 eLearning Trends That Will Go Big in 2023
- 86 Profitable Online Course Ideas & Examples for 2022
- How to Create and Sell Profitable Online Courses: Step-by-Step Guide
- 18 Amazing Outline Templates to use in Course Design [3 Downloadables]
- Starting an Online Course Business from Scratch
- Sell Digital Downloads: The Complete Guide for 2022
- Knowledge Economy: How to Sell Knowledge Online

Nick Malekos is a Senior Digital Marketer in LearnWorlds. He is a results based and well-rounded Digital Marketer with years of experience in the education industry, writer and digital literacy trainer.