Use an elearning website builder for your elearning site: Templates and examples
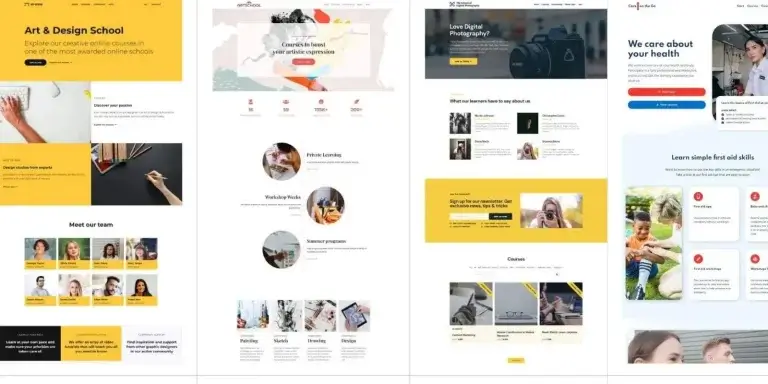
Table of Contents
Are you an educator or a business owner who wants to build an elearning website? If so, you have come to the right place to learn more about e-learning platform development.
The all-powerful LearnWorlds Wesite Builder can help you build a training website within minutes. The website builder comes with 50+ elearning website templates, full customization, and added functionalities like pop-ups, controlling visibility, HTML/CSS editing, and much more!
Are you ready? Let’s get started.
How to Create an eLearning Website in 4 Simple Steps [2021]
When it comes to online education, there are many online course development platforms and Learning Management Systems (LMS) that can help elearning professionals build their websites to create and sell online courses. That said, you still may need an authoring tool for the actual course creation.
At LearnWorlds, we pride ourselves on being one of the top providers of comprehensive learning solutions. Our platform combines intuitive and elegant website design, mobile responsiveness, pre-made & customizable templates, and course authoring in one tool that gives you full control of your elearning website and the user experience. Create your website today, hassle-free!
Building your online learning portal: 4 easy steps
Your elearning website is the platform you are going to use to share knowledge, facilitate learning, and reach your audience. Whether you aim to educate students, train employees, or create a repository of specialized courses, it’s going to be the most versatile tool in your inventory!
With this guide, we’ll quickly walk you through the steps to build an online training portal and elearning site offering an engaging, user-friendly, and effective online learning environment that caters to your business needs using our powerful no-code Website Builder.
Step #1: Choose your elearning website template
Let’s see the first step to building an online learning platform to sell your online courses. Our Site Builder comes with a set of customizable elearning website templates to make the web design process easier for you.
Unlike e-learning platforms and marketplaces such as Coursera, Udemy, Udacity, or edX, where the UX design and learning environment are pre-defined, LearnWorlds, as a truly white-label e-learning platform, allows for in-depth customization even if you’re a complete beginner. With our platform, you can build your course pages exactly as you like to match your brand (after all, you’re a knowledge entrepreneur, and personal branding matters!).
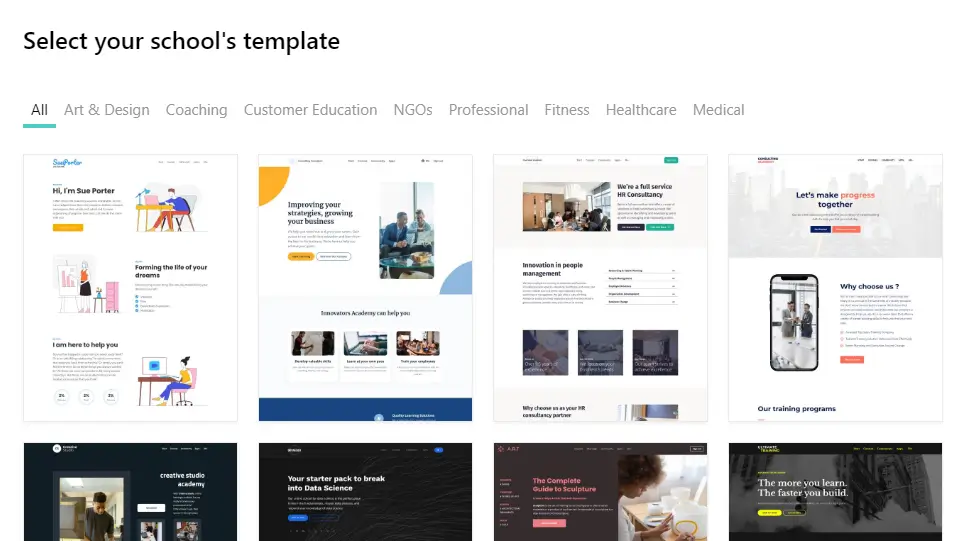
The first step when you create a LearnWorlds account is to choose the template you want to work with.
There are 50+ Professional Templates to choose from. Choose which one works for your industry and further customize it to fit your elearning business:
Then, use the following tools to customize the website experience further as you like. Give it a professional or fun mood, and design it for children, K12 education, or corporate training. The choice is yours!
The Site Flavors (Full website templates)
The Site Flavors feature allows you to completely redesign your entire school in just a few clicks. You can clone your current site, edit the theme, customize the design on your own page, and instantly switch and update the entire website with a brand-new design!

You can create as many designs as you need for any occasion or just to refresh your site. You can even make short-term changes to your school’s site without compromising the site’s original design. Learners will view your learning website’s new design only when you activate it.
For example, you can create a Black Friday version of your website, keep it on for 24 hours, and instantly return to your original website theme.
Select a theme that describes your business or industry best and is closest to the website style you want to create to attract your target audience. If you offer courses on professional development, for example, go for a more sleek template.
💁 Remember: all our templates are mobile responsive because a responsive website is equally important as a good-looking website.
Once you have chosen a template, give it a name and click on ‘Create site flavor’. Start making your changes, and click ‘Save’. At any point, you can go back and edit it.
💁 To access the Site Flavors, log in to your LearnWorlds school, click on the Website > Design, and then select ‘Manage Site Flavors.’
The Page Templates (Full page templates)
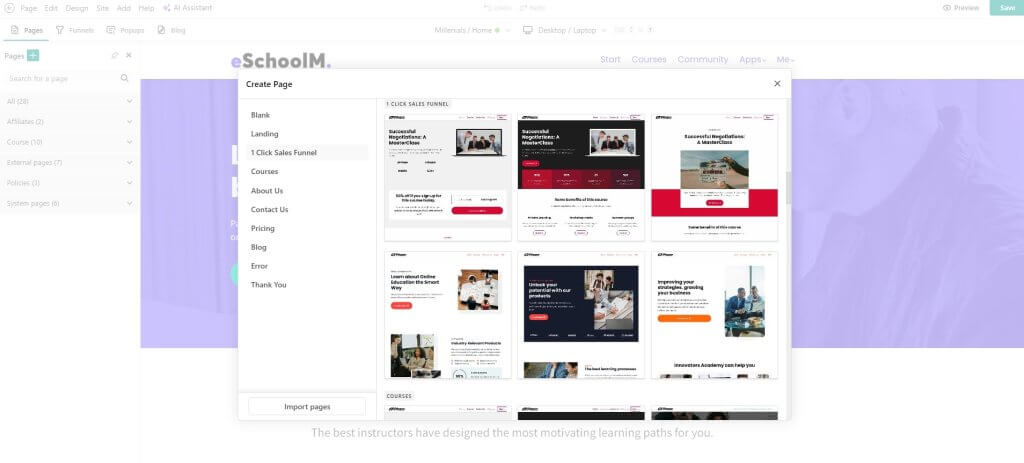
Apart from the full website templates, there are also some ready-made templates for specific pages you want to add to your website like your homepage, landing page, About page, Thank You page, Contact page, Courses page, After login page, Payment page, and many more. We even offer course website (and page) templates out of the box.
Access the list of page templates from the Site Flavors page. Pick one and hover over it, clicking on ‘Edit in Site Builder.’
Inside the site builder, click on Pages + ‘Add new’ on the top menu.
Each template has a different layout, structure of zones, and design elements, so you get to choose those that suit your preferences.
Design zones
What’s great about the Site Builder is that it allows you to customize each content block or section of your landing page, even if you have zero experience with coding or frontend/backend web development!
Each type of page (Landing, 1 Click Sales Funnel, Courses, About Us, and so on) has its own variety of design zones allowing you to make unique and limitless combinations of layouts.
For example, you can choose the design for your Hero section (aka website header) by going through a set of ready-made designs that present the elements of text, image, and video content in different ways.
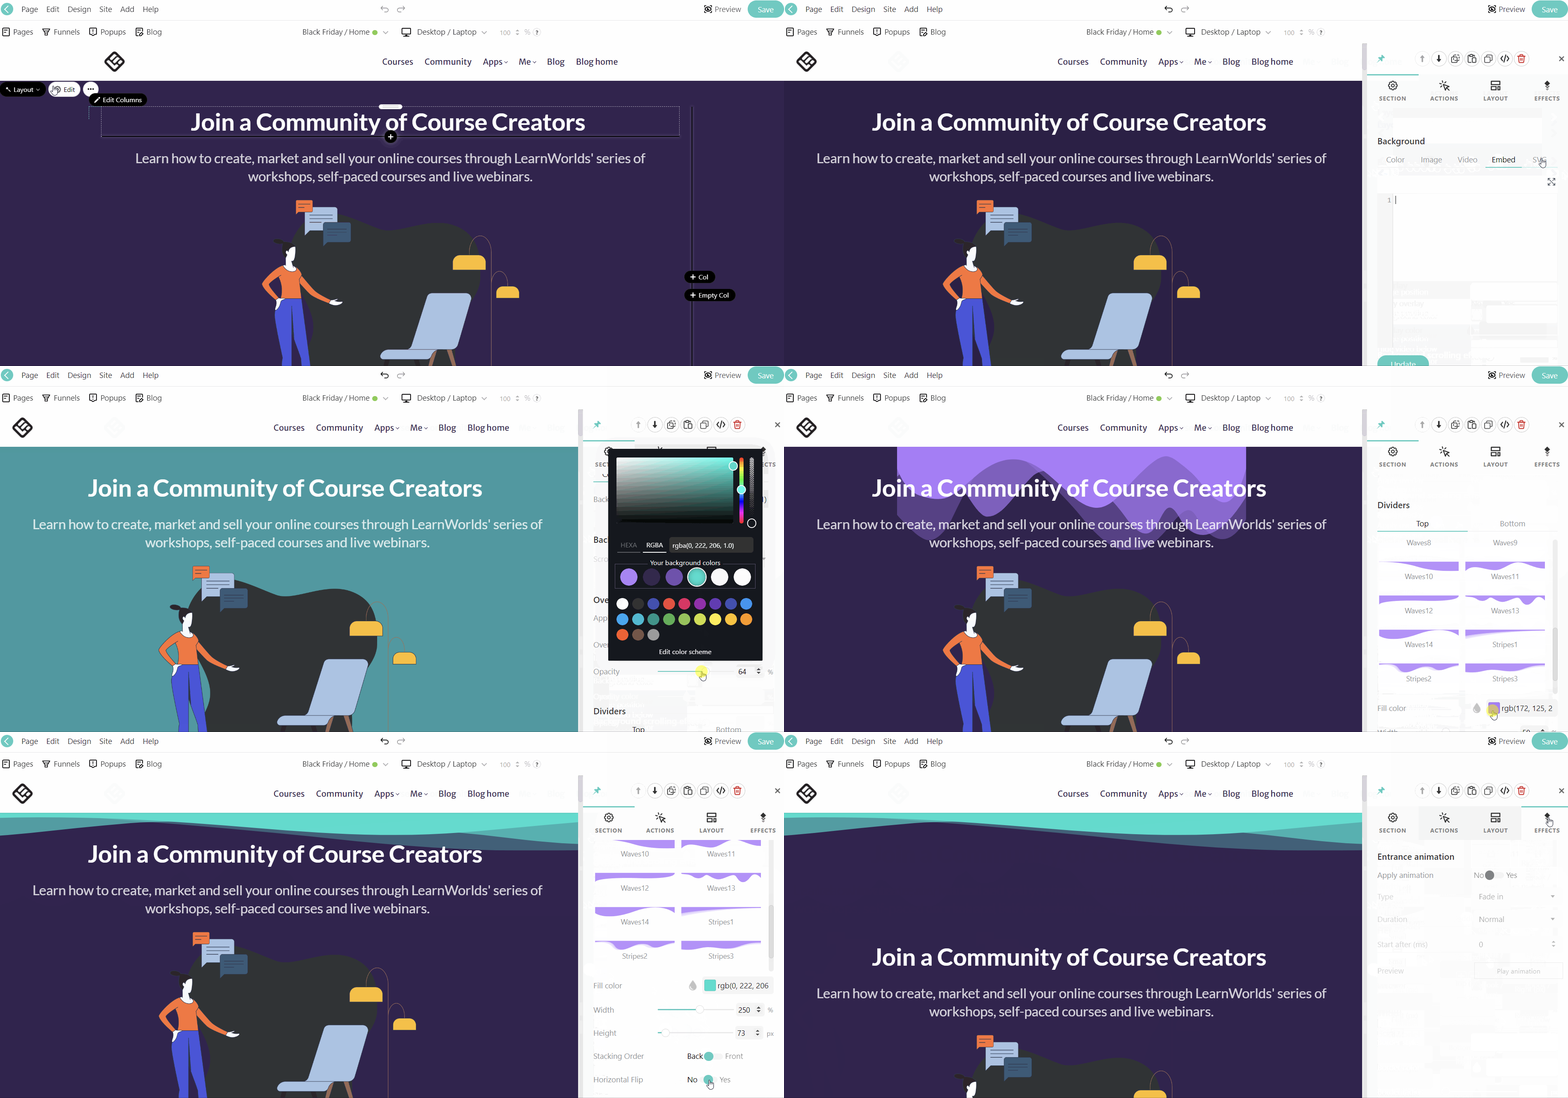
The same goes for your product section, your FAQs, your offers, pricing tables, email grabbers and contact forms, student info, and even your CTAs sections, amongst others.
Then again, if you prefer to get creative on your own, you can easily build your own layout with just a few clicks.
You can access the design zones by clicking on the ‘Add Section’ button on the page you are currently editing.
Adding widgets
While working on the design of the sections, you can add your own widgets.
Inside a widget, you can embed code, add any type of image you want, or insert a video from YouTube, Vimeo, or Wistia.

Click on ‘Add a Widget’ or the + sign to open a collection of ready-to-use headings, icons, GIFs, vector graphics, animations, counters, event calendars, tabs, accordion, typing effects, buttons, social media buttons, video placeholders, and so much more to create your content.
Customized experience, visibility, and pop-ups
There is now a way for you to offer a more personalized, inclusive, interactive, and high-quality learning experience to your users.
With our unique tagging system, you can add tags for your students. This way, you segment your customer base and then create zones on your landing page that are visible only to specific individuals or a group of students.
Apart from the ability to personalize the design of the page for a specific user (from Page Templates > Student Info), you can also customize the signup fields through your ‘Site Settings’ with the addition of user-specific questions in their registration process.
This is an important functionality to try out, especially if you have different target audiences and you are running distinct marketing campaigns for them. It also helps to distribute content or any other course-related information relevant to their needs.
From now on, each student will have their own UTMs, too, allowing you to track where they came from using Google Analytics and better monitor what they are doing inside your platform.
You can also create pop-ups that you can show to all your visitors and students or customize them to a specific group.
💁 Read more on the pop-ups here.
Step #2: Customize your elearning website
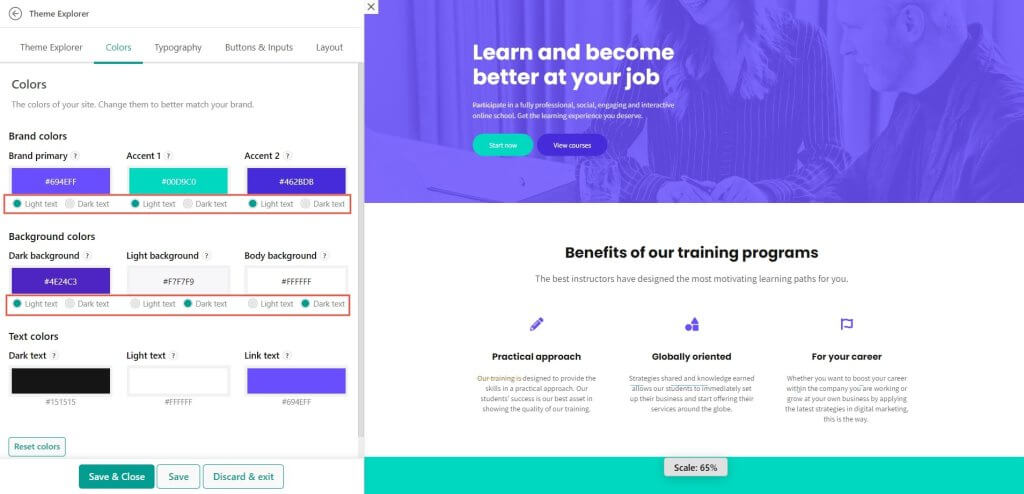
The Theme Explorer is basically the command center of your website when it comes to customizing your school. The changes you make here are applied to your entire website. It is built to help you keep things consistent. For example, if you choose a color scheme or a font combination, those will be applied across your site, not only on your course’s landing page.
There is a plethora of premade color schemes that you can choose from, as well as font combinations and even content layouts. Selecting or modifying any of these options will instantly show how your page will look as the site updates. Cool, right?
Suppose you’re an educational institution with red and blue colors in your brand that wants to create a school website. Wouldn’t it make sense that you’d also want those colors to reflect on your online educational platform?
The branding process is made super easy for you with Theme Explorer since you can easily set your primary and accent brand colors and apply them across your entire website. For further customization of your elearning site, you can access Theme Explorer.
From there, you can adjust the colors you use, the fonts, and the page layout and instantly see their effects applied to your page.
Colors: Choose the colors for your brand, background, and text. If you can’t find the colors you need from the color palette, enter the RGBA codes that match your preferences.
Typography: Use the typography settings to choose your font family, headings, and text sizes. You can choose three or more fonts from a rich library of font styles.
Buttons & Inputs: Change the display buttons and inputs easily by increasing or decreasing your font sizes, paddings, and border-radius.
Layout: Decide on the height of your sections on the page and make them as big or small as you wish.
To use the Theme Explorer, click on the ‘Design’ tab inside the Site Builder.
As you go deeper into adding the content on your page, you will notice that the right-hand toolbar is there to help you make further customization* on the elements you add in your sections.
From here, you can make individual changes to text sizes, colors, element position/alignments, and appearance. Also, you can insert links between your pages or decide which elements should be visible to whom and by which devices (smartphones, tablets, desktops/laptops).
*If you know how to code, there is always the option to add custom CSS code.
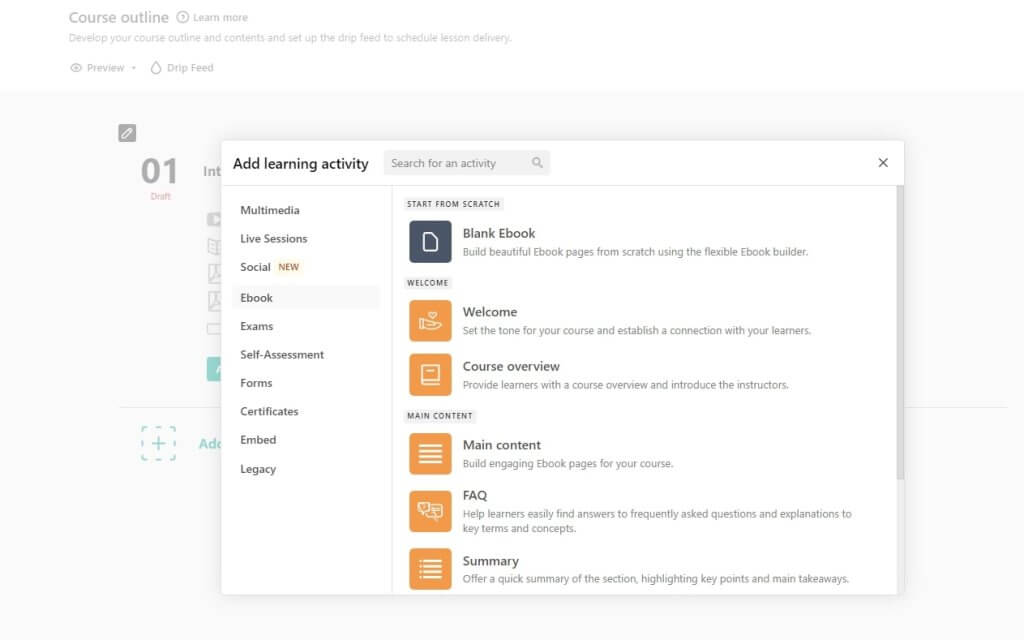
Step #3: Build your online course
To launch your elearning site, you need to create online training courses – at least one, to get you started.
Creating online courses can be a piece of cake, especially if you already have some content that you can reuse, like blog posts, PowerPoint presentations, video tutorials, podcasts, or even infographics.
Everything that adds to the knowledge of the subject you are teaching can go into your course content.
Just think about which learning materials and activities you want to add to your courses.
Would it be a text, an ebook, audio, a series of PDFs, a webinar, a YouTube video, an assignment, a quiz, a SCORM/HTML5-type of content, gamification elements, a certificate of completion, or all of them?
Once you build that one course, you can repeat the process for the others to come.
💁Need help on how to build online courses? Check out our easy step-by-step guide.
Step #4: Launch your e-learning platform
Before launching your elearning site and your mobile app, there are a couple of important things to consider.
These are pricing your course, choosing an efficient eCommerce solution – a payment gateway from where you will accept payments – your go-to marketing tools, establishing your website’s domain name, and connecting your site domain.
Pricing your online course
There are many tactics to price your course, but the most effective is finding the optimal price tag for your course and discovering where the best value for money is.
Ask for the price at which you feel comfortable, taking into consideration its length and the time and effort you put into building your course.
Also, consider the number of learners you are ready to take in and evaluate the time you need to spend with them. You can offer a full self-paced course at a low price, but if you offer coaching, live classes, and feedback, you can’t undervalue your own time.
💁 For more information, check our Ultimate Guide on How to Price Your Course.
Choosing a payment gateway
LearnWorlds supports a range of payment options. You can choose one or combine any of the following payment gateways:
Out of these, Stripe is the only payment gateway that supports subscriptions and payment plans. If you want to accept payments for specific European countries, you will need the following local payment gateways:
💁 For more information on how to use the local payment gateways, click here.
Investing in marketing tools
Some marketing tools can make your life as an edupreneur a lot easier.
Whether you want to automate mundane tasks, prepare email campaigns, or communicate with your students directly, LearnWorlds integrations are at your disposal.
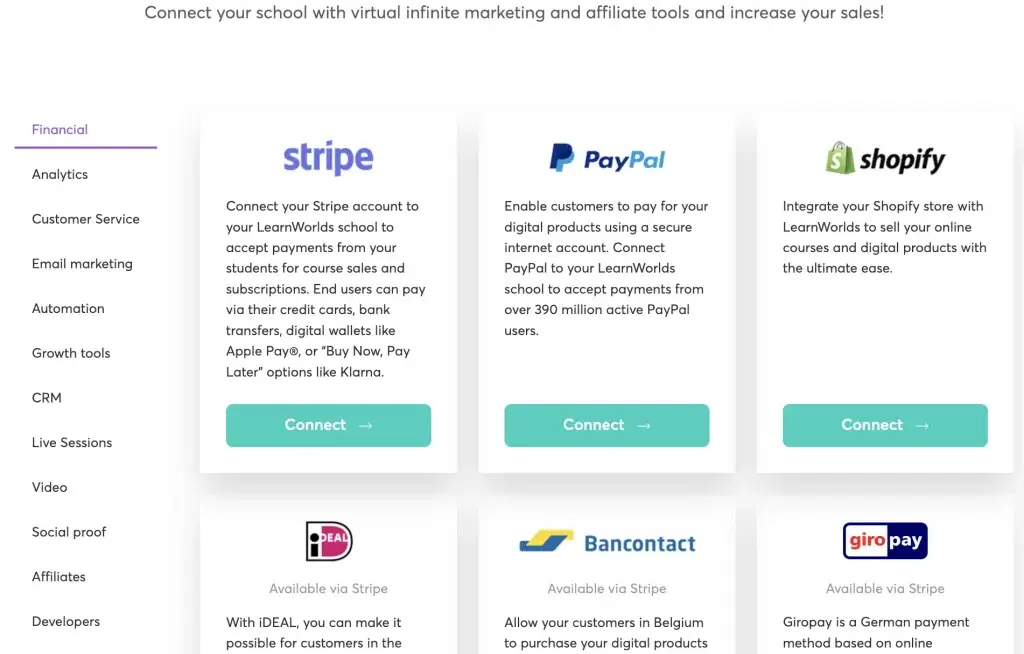
💁 Visit our integrations page and check which software or app works best for you.
Connecting your domain
If you already own a website or a domain name, then you can easily connect it to your LearnWorlds account. To do this, you will need to choose whether to use your main domain as your school’s website or a sub-domain.
Let’s say you own www.myperfectonlinecourse.com, you can connect your school – myschool.learnworlds.com, to the address.
If you already have a website or blog connected to the domain, you don’t want to lose that. Here comes the subdomain to save the day!
You can create a subdomain like “academy” and connect your school there. In this case, it looks like academy.myperfectonlinecourse.com
Other popular subdomains are:
💁 For more information on how to connect your domain name with your LearnWorlds site, click here.
Once you have everything in place, you are ready to launch your course website using these templates!
Elearning website examples
Here, you will find some great examples of elearning websites from online educators across the web to get inspired. See how to develop an online learning portal as these guys have:
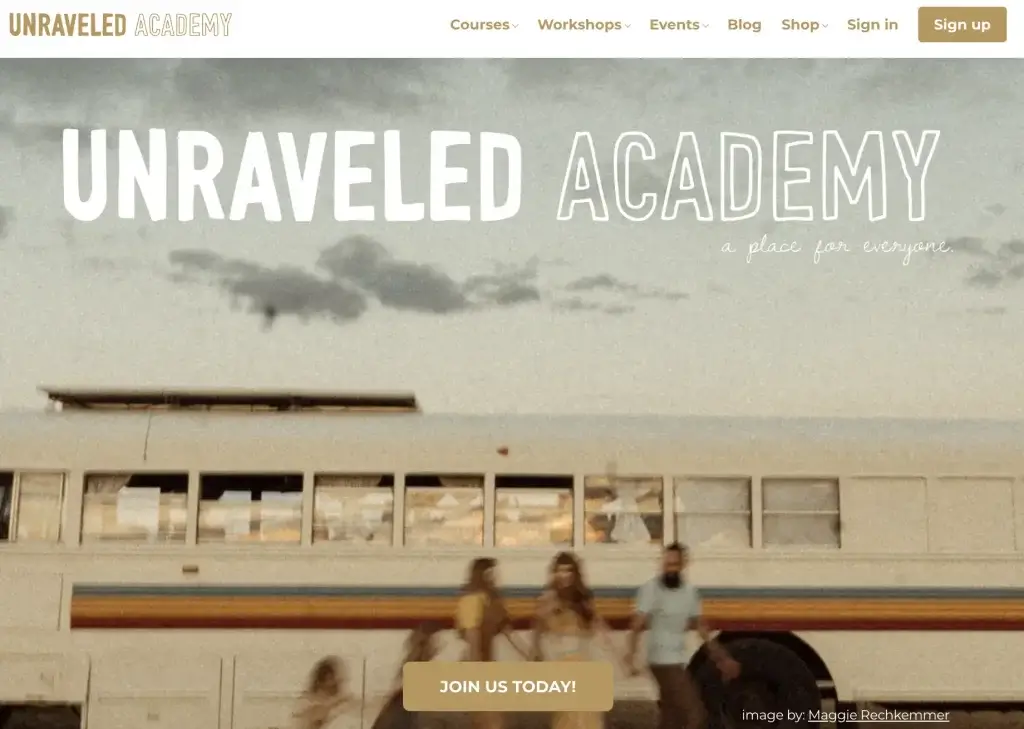
Unraveled Academy
The Unraveled Academy teaches photography and photo/video editing skills while it nurtures a big community of amateurs and professionals. Their academy is an example for anyone looking to get inspired while launching creative courses.
Lokalise Academy
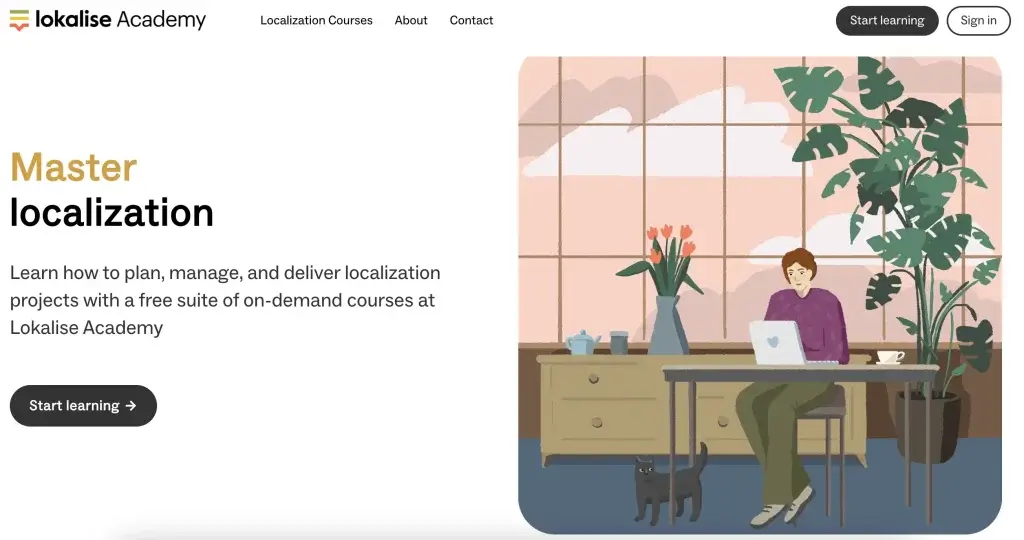
Lokalise Academy teaches localization for every part of your business: Marketing, Design, Development, and more. The beautiful combination of colors and animated visuals will inspire any professional elearning website!
Maples
Maples is a school that provides anti-money laundering services to B2B customers. Its landing page is a perfect example of elegant, simple, and sophisticated, yet eye-catching and modern, design – perfect for corporate training where you want to focus more on the substance and less on the looks.

AIMRRA
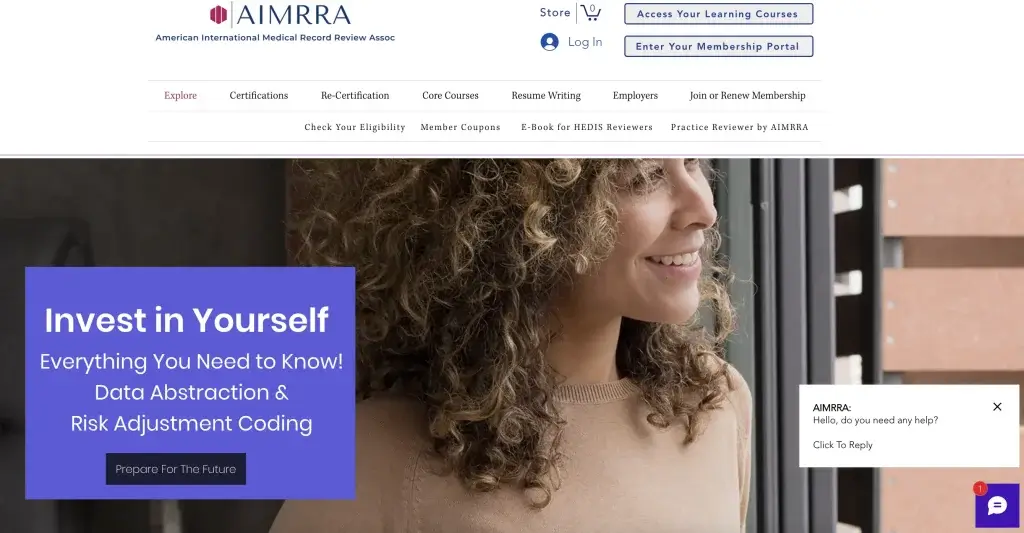
AIMRRA (American International Medical Record Review Association) provides training and certifications for healthcare professionals. Their landing page is as comprehensive as a landing page can be – site visitors and members can see at a glance all the available products and options in one intuitive page.
LearnWorlds is helping you build your elearning website from scratch
Whatever needs to go into your elearning website development, LearnWorlds has it. With our unique Site Builder, the website design process is made simple.
Any online course creator can rapidly and effortlessly build an entire school using hundreds of ready-made templates and widgets. Businesses can build an elearning website for training their employees and make use of our robust e-learning course creation tools and e-learning software solutions to streamline learning. Our platform offers an all-in-one solution that replaces many third-party tools and requires zero code skills.
So what are you waiting for?
As the elearning industry is growing, use your expertise to provide paid on-demand training courses or learning programs to people who could benefit from leveling up their skills. You can even provide free courses to train your employees or customers. In this post, we’ve shown you how to make an educational website, so you can get started ASAP.
You can create mini-courses and digital downloads as lead magnets to boost course enrollment and lead generation. Whatever your business model and course material you have, whether you are a startup or an established enterprise, you will discover that LearnWorlds is the ideal online learning management system and one of the best fully customizable e-learning platforms for monetization and business growth.
Ready to invest in your e-learning platform development? Start your own free 30-day trial with LearnWorlds today and build the elearning website of your dreams!
FAQs
How to create an online learning platform?
Start by identifying your target audience and course offerings. Use an elearning website builder to design your platform, add course content, and ensure it is mobile-friendly. Also, look for tools that support customizable templates, multimedia content, student progress tracking, and certifications like LearnWorlds.
How can I build my elearning portal?
Choose an elearning-specific website builder, customize the design using templates, and upload your e-learning platform courses. Ensure the portal is intuitive and integrates features like user dashboards, quizzes, and feedback systems to meet your needs. Prefer to use a modern no-code website builder that doesn’t require coding knowledge but instead offers simple drag-and-drop tools.
How to start an elearning business through a website?
Identify your niche, and then create online training courses that cater to a specific audience. Use an online course platform or LMS to create and monetize your e-learning platform courses through one-time payments, subscriptions, or memberships. Partnering with sponsors or offering certifications can also generate additional income.
Further reading you might find interesting:
Rosemary is LearnWorlds’ Content Marketing Manager. She has over 2 decades of experience in omnichannel marketing and content writing for the IT and SaaS industry. Her expertise lies in crafting effective content marketing strategies that attract, engage, and nurture customers, enabling LearnWorlds to reach its target audiences with precision.


